Contacts & CRM
Create contact in Leadgains
Use this SOP to manually add a new contact, check contact details, set DND settings correctly and, if necessary, send an SMS.
Brief overview
A contact is the basis for conversations, appointments, opportunities and follow-up in Leadgains. Only create a new contact manually if you are sure that this person does not yet exist.
After creating, check the information in the contact detail window. Pay particular attention to telephone number, email address, contact type and DND, because these determine which channels someone can still receive communication through.
Video explanation
View the walkthrough if you want to see the complete process in the system.
This video is in Dutch. Click the gear icon in the video player, turn on Closed Captions and choose English under Caption Language.
How to change subtitle languageStep-by-step plan
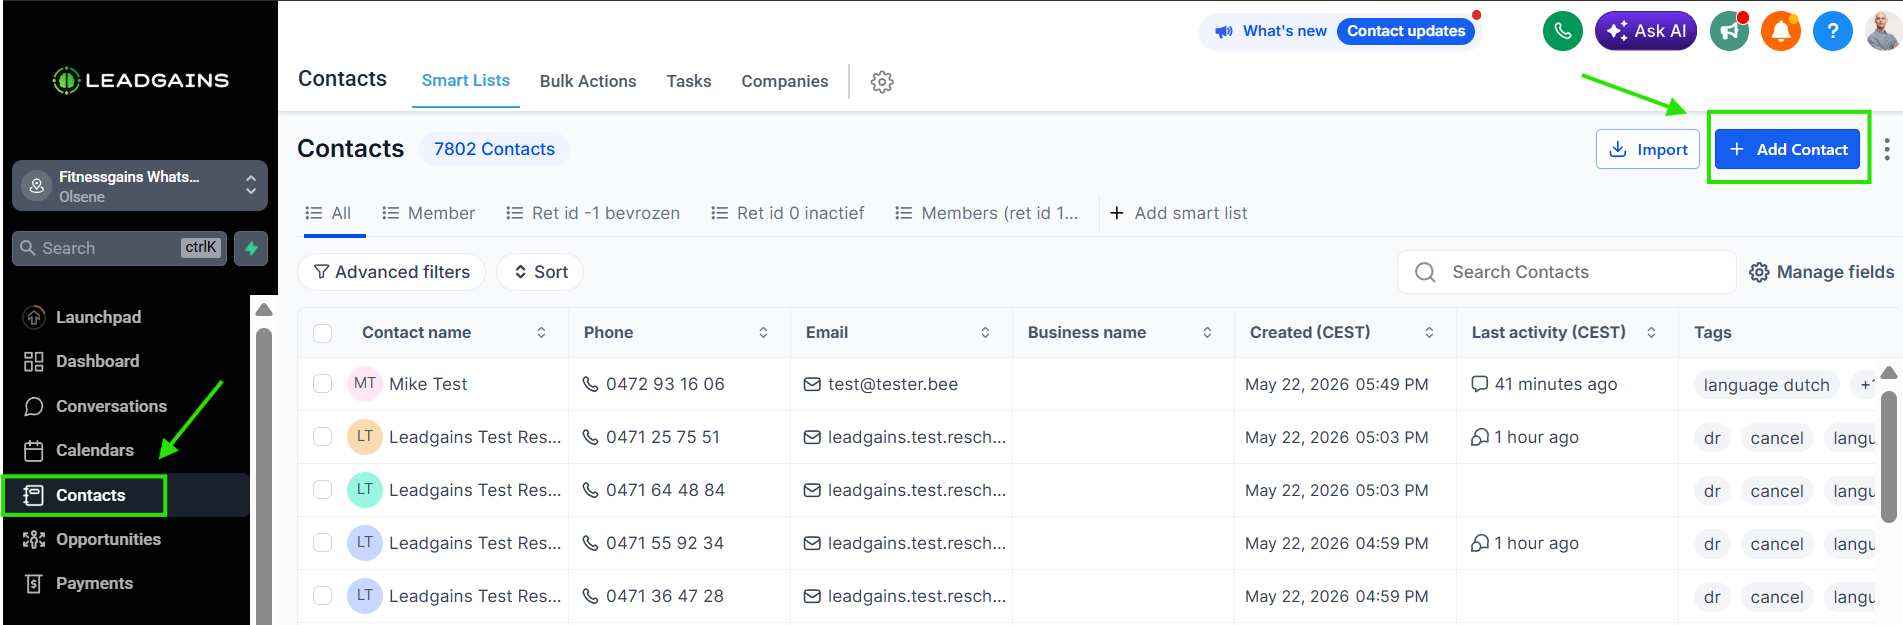
Step 1 - Open Contacts and click Add Contact
In the left navigation, go to Contacts. Then click at the top right Add Contact. A side panel will open where you can enter the new contact.
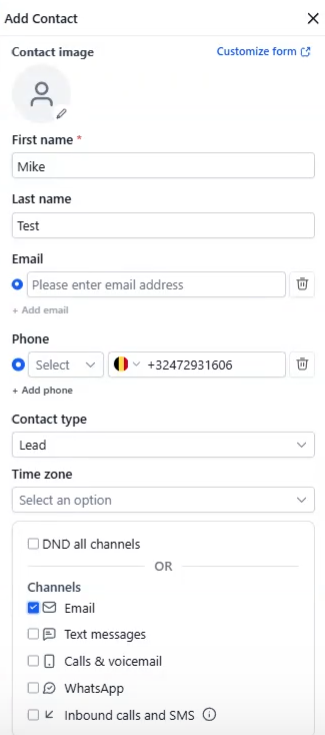
Step 2 - Fill in the contact details
Fill in the available data: First name, Last name, Email and Phone. Choose at Contact type what this person is, for example lead, existing member, former member or staff. You do not have to enter the time zone.
At the bottom you can set DND. DND means Do Not Disturb. This excludes someone from communication via all channels or via specific channels, such as e-mail, text messages, calls & voicemail, WhatsApp or inbound calls and SMS.
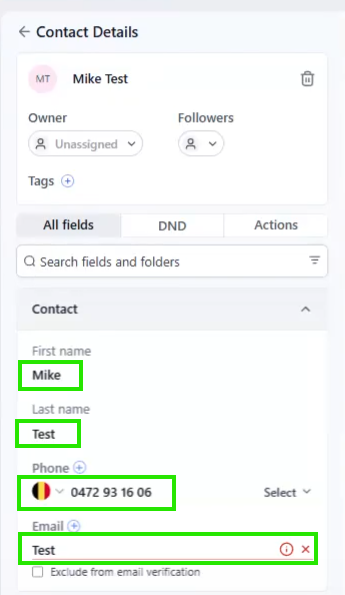
Step 3 - Check and save the data
After creating you can still adjust the data in the left contact panel. Check name, telephone number and email address. Click Save when you have made changes, so that the data is saved.
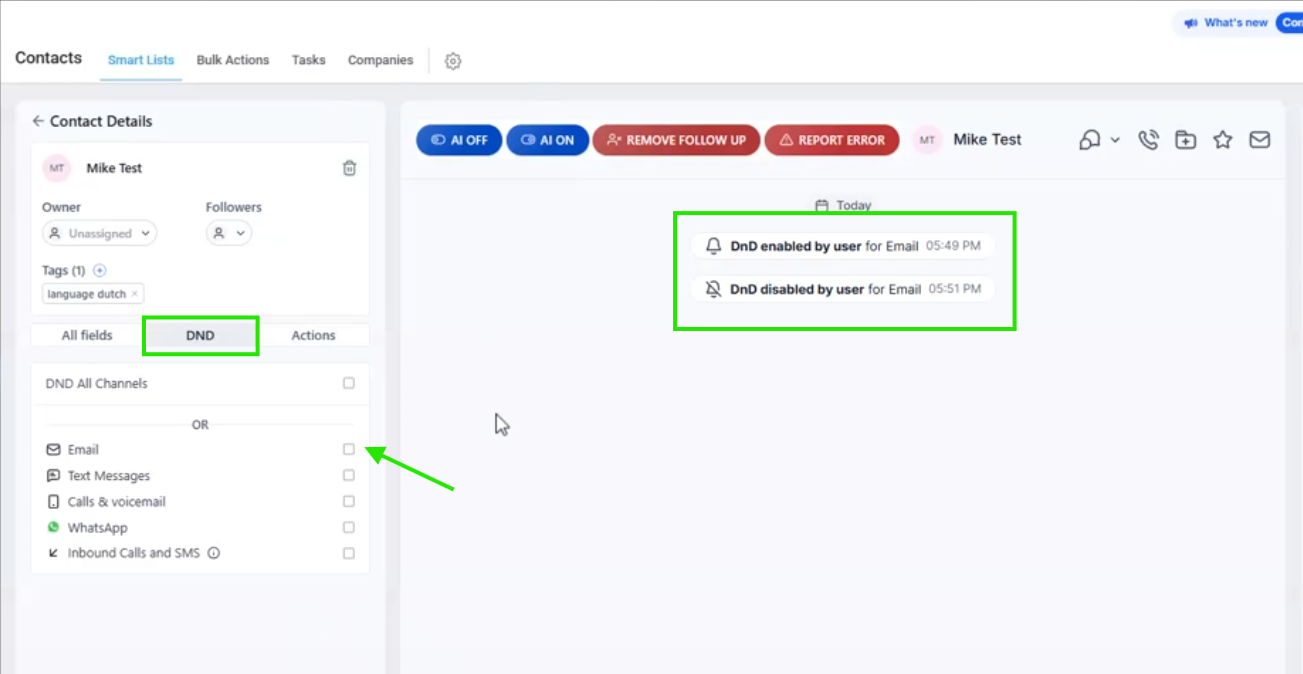
Step 4 - Check DND in the contact detail window
In the contact detail window, open the tab DND. There you can see whether DND is enabled for all channels or for a specific channel. If you want this test contact to be able to receive emails again, check this box Email back out.
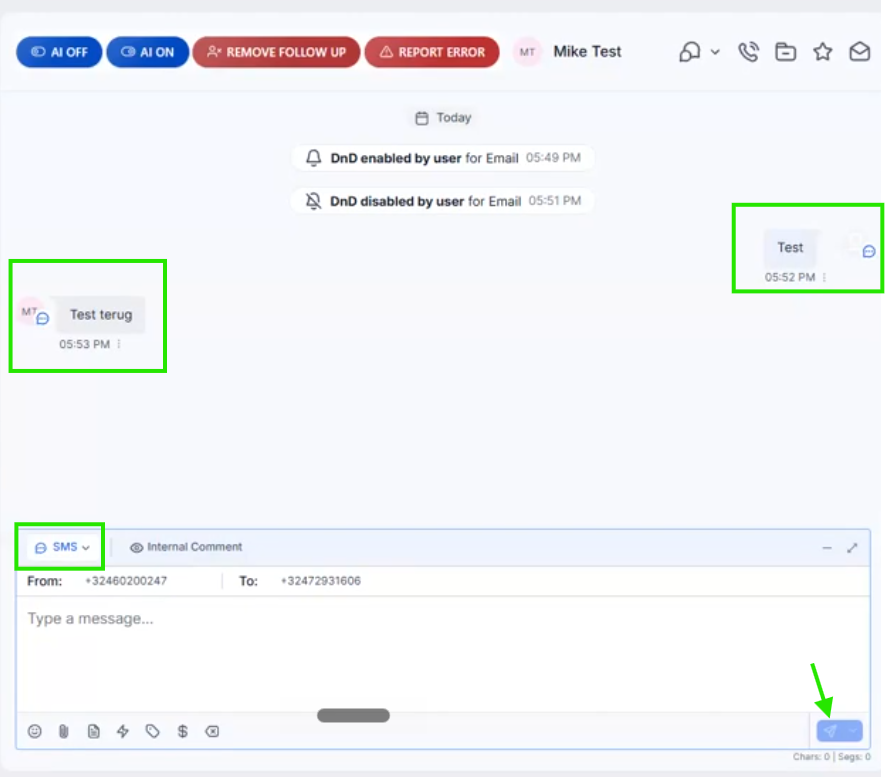
Changes to DND also appear in the conversation timeline. So you can see that DND was first enabled and then disabled again.
Step 5 - Send an SMS from the conversation if necessary
If you want to send a message, use the text box at the bottom of the conversation timeline. First check that the correct channel is selected. This example states SMS selected.
Type your message in the text box and click the send button. You can choose to send the message later via the arrow next to the send button.
Common problems
Check if you're in Contacts and whether you have sufficient rights to create contacts. If the button is missing, ask an administrator to check your rights.
If the contact already exists, you cannot create a duplicate contact with the same phone number or email address. Then adjust the data to the existing contact.
Check the DND tab. If DND is enabled for email, text messaging, or WhatsApp, communication through that channel will be blocked.
Check required fields, error messages and the format of email address or telephone number. Click Save before clicking away.
Check if the contact has a valid phone number, or SMS is selected in the text box and whether DND for text messages is not enabled.