Conversations & appointments
Make an appointment from Conversations
Use this SOP if you want to immediately book, reschedule, cancel or put an appointment on No show during a conversation.
Brief overview
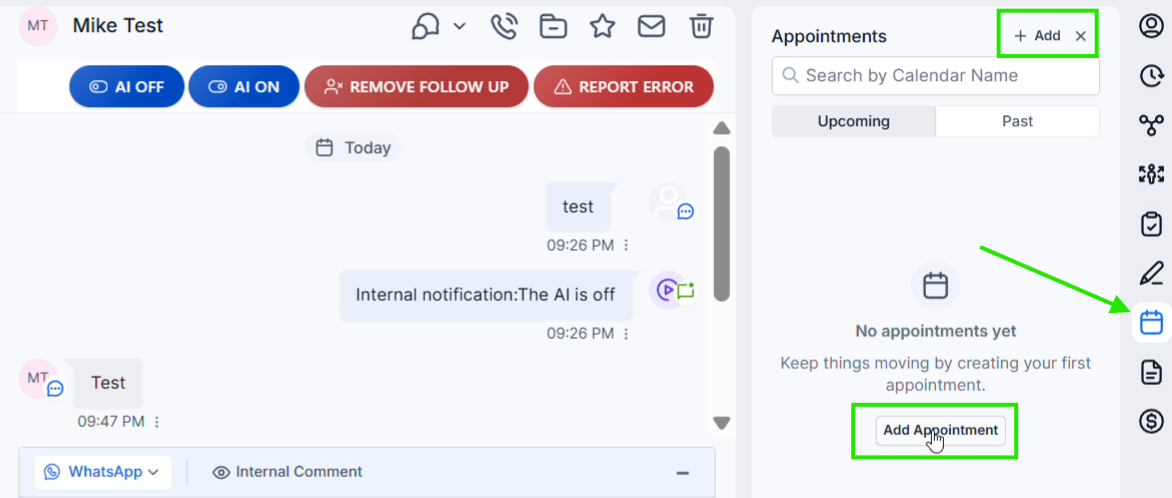
Open the correct contact via Conversations into app.ldgns.be. In the right sidebar open Appointments via the calendar icon and click on +Add or Add Appointment.
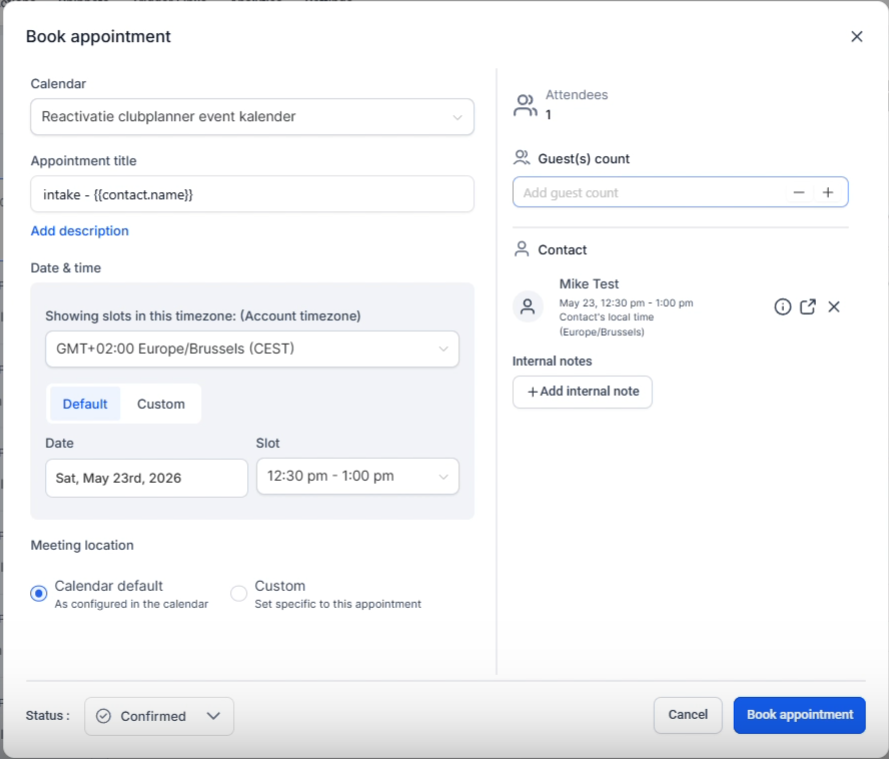
In the appointment widget you choose the calendar, title, date, time slot and meeting location. After booking, you will see the appointment in the Appointments panel and a notification will also appear in the conversation timeline.
From the same panel you can reschedule the appointment later or change the status to, for example Cancelled or No show. Only use those statuses when the appointment outcome is really correct, because they can trigger follow-up and opportunity updates.
Video explanation
View the walkthrough to see how to open the Appointments panel, book an appointment, and then adjust the appointment status.
This video is in Dutch. Click the gear icon in the video player, turn on Closed Captions and choose English under Caption Language.
How to change subtitle languageStep-by-step plan
Step 1 - Open Appointments in the conversation
Go to Conversations, open the correct contact and right click on the calendar icon to Appointments to open. Then click +Add top or on Add Appointment in the empty panel.
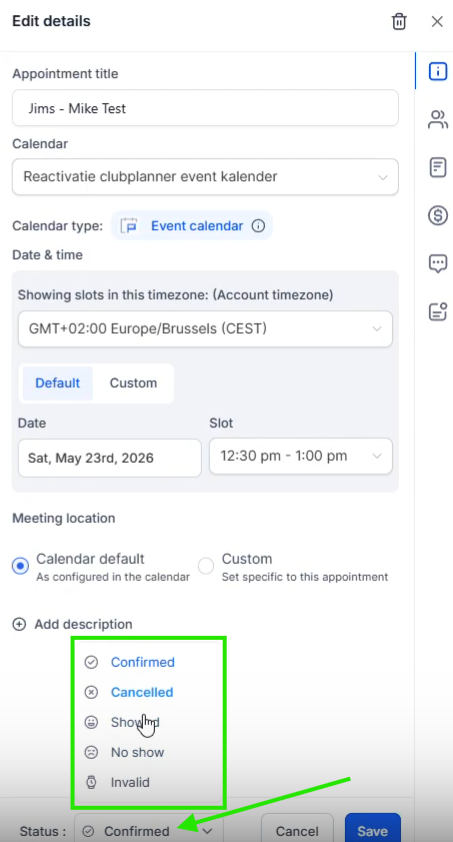
Step 2 - Fill in the appointment widget
Choose the right one first Calendar. Then check the Appointment title; you can use fixed text or enter a contact value such as the name of the contact.
Choose at Date & time an available time slot via Default. If you deliberately want to book outside the available calendar settings, use Custom and choose the start and end time yourself.
Late Meeting location usually up Calendar default stand. Only add a custom meeting location when this specific appointment requires a different location or link. Then click Book appointment.
Step 3 - Check if the appointment has been booked
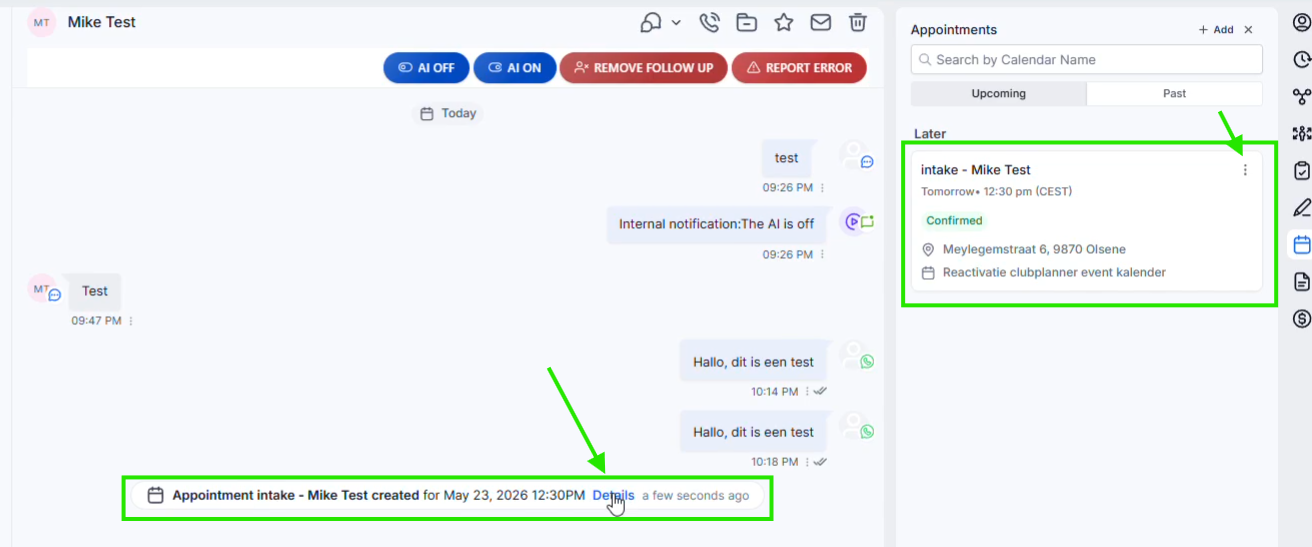
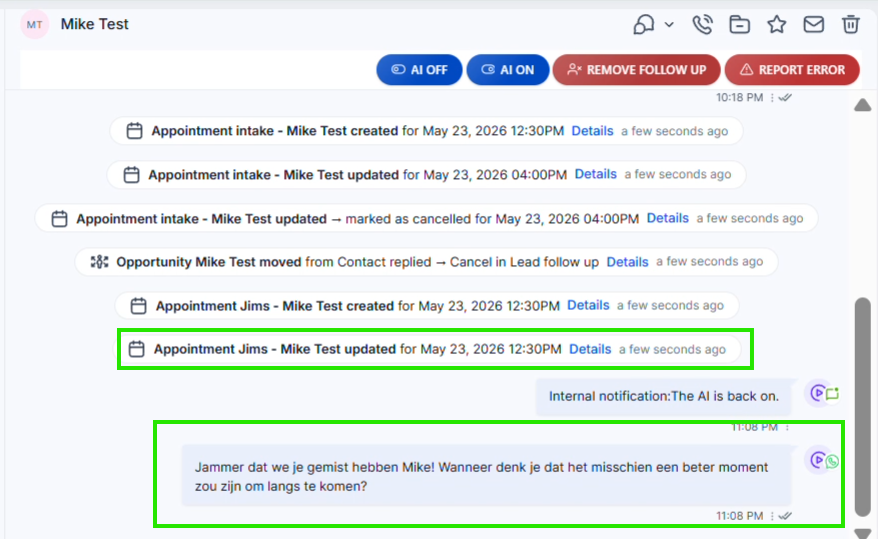
After booking, the appointment is shown on the right Upcoming. You see the title, the moment, the status, the meeting location and the calendar. A system message will also appear in the conversation timeline that the appointment has been created.
Step 4 - Reschedule if necessary
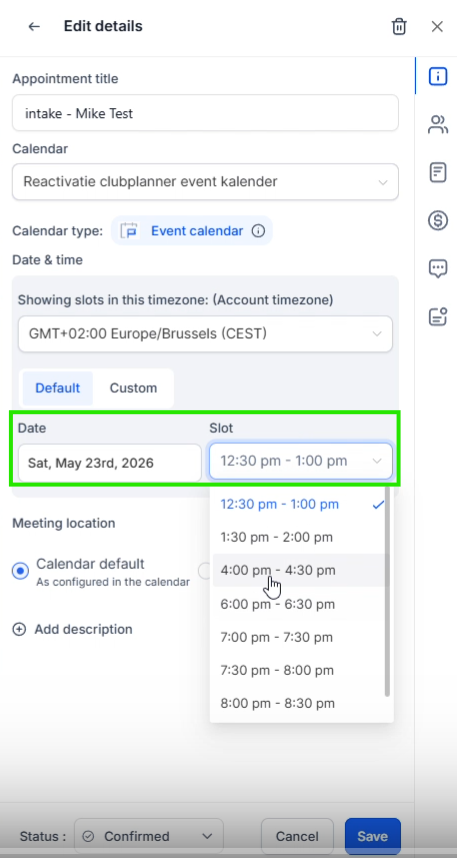
Open the appointment via the three dots or via Details and choose Edit. Fit in Date & time the date or end and click Save. Leadgains then registers that the appointment has been updated.
Step 5 - Adjust the appointment status correctly
Open the appointment details and use at the bottom Status to mark the appointment as Confirmed, Cancelled, Showed, No show or Invalid. Save the change.
Step 6 - Pay attention to automatic pipeline connection and follow-up
A status change can become visible in the timeline. Set up the appointment No show, then the opportunity moves to No Show. If you cancel the appointment, the opportunity will move to Cancel. This also works the other way around: if you move the opportunity to No Show or Cancel, the linked appointment status is automatically updated.
From No Show or Cancel can start automatic follow-up to book an appointment again.
Step 7 - Use the same tab from Contacts as well
You can do the same Appointmentsinformation can also be found via the contact sheet. Open the contact, go to the Appointments tab and check the current and past appointments there.
Common problems
Check whether you are in the conversation of the correct contact and click on the calendar icon on the right. The panel opens on the right side of Conversations.
First check whether the correct calendar has been selected. If the moment is deliberately out of availability, use it Custom to choose the start and end time yourself.
Use normally Calendar default. Choose alone Custom when this appointment requires a different location, link or address.
That may be normal behavior when the no-show follow-up is active. The appointment status No show also sets the opportunity to No Show. Use No show therefore only if the contact really did not show up.
Changing an appointment status is not the same as deleting follow-up. If you want to prevent the contact from receiving automatic follow-up or appointment reminders, use the SOP Remove someone from follow-up.
Use the SOP for this Manage appointments with the list view. This page is specifically about working from Conversations.