Calendars & appointments
Manage appointments with the list view in Leadgains
Use this how-to to manage appointments from Appointment List View: filter for relevant appointments, save recurring Smart Lists, customize columns, and quickly update appointment statuses.
Brief overview
Appointment List View shows appointments in a workable list instead of a classic calendar view. This is useful when you want to follow up, sort or check many appointments at the same time.
Smart Lists allow you to save filters, sorting and columns. For example, you can create a fixed list for upcoming appointments per employee, canceled appointments or appointments that still need to be followed up.
Step-by-step plan
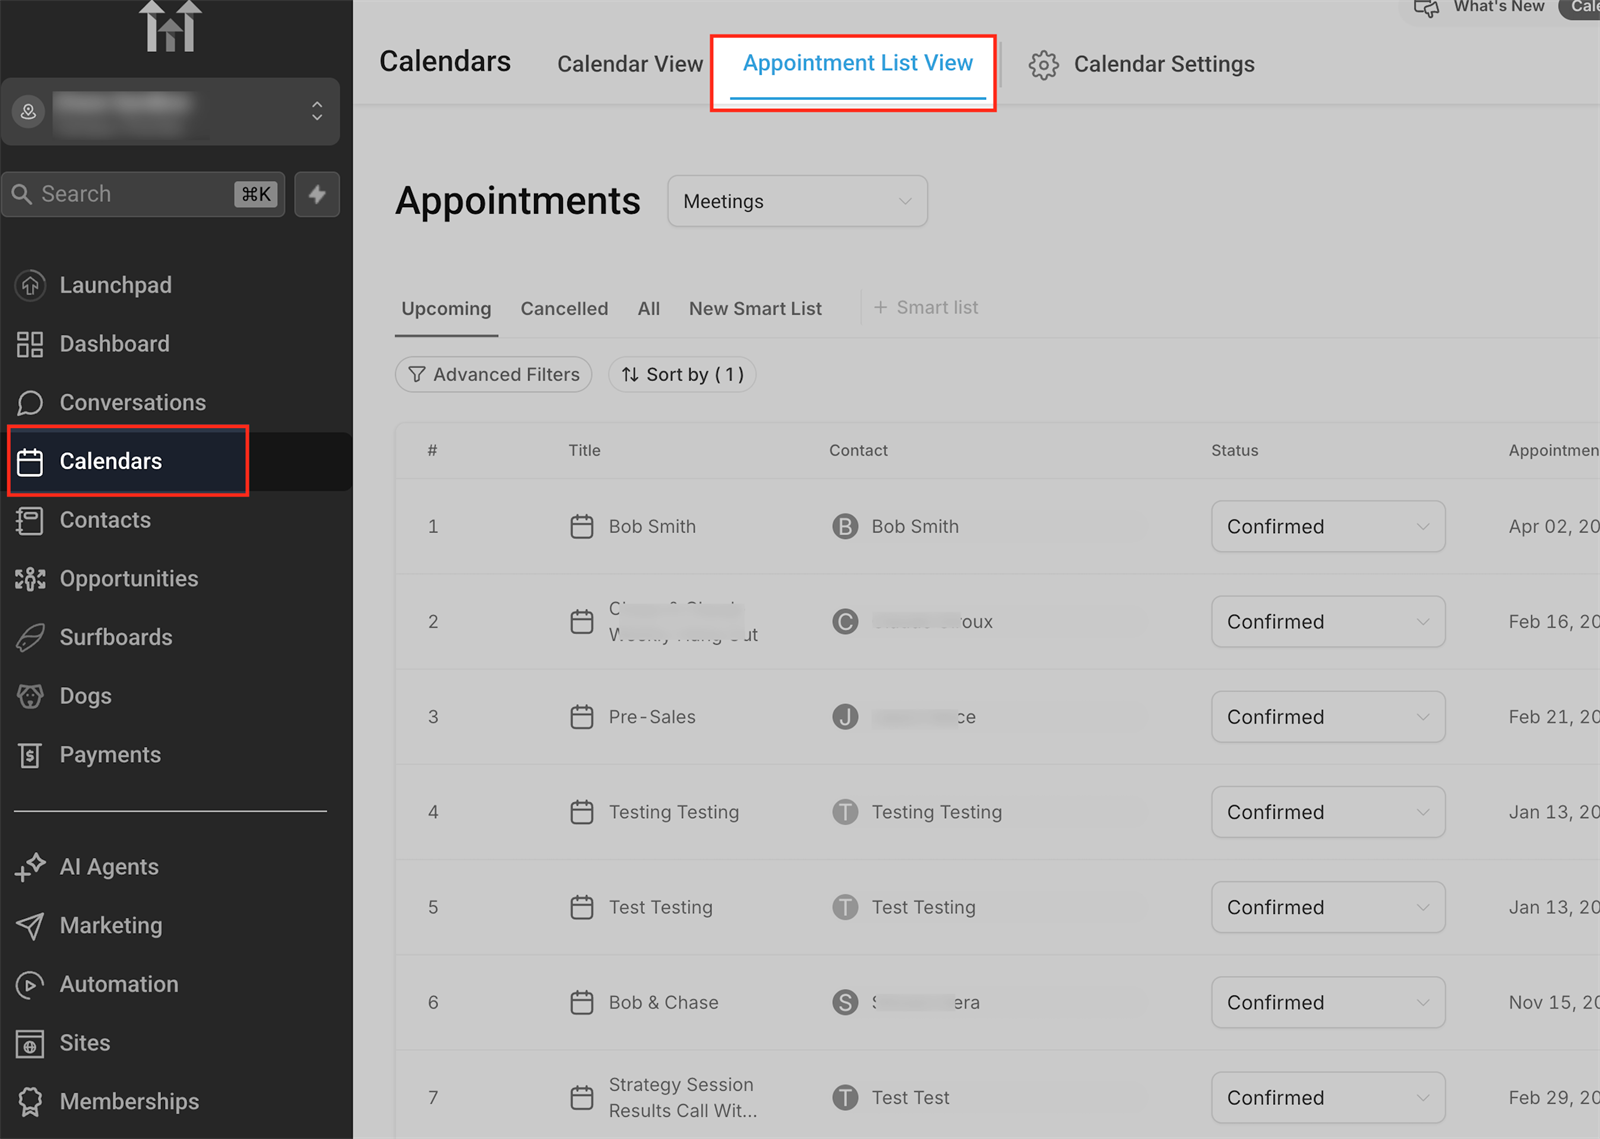
Step 1 - Open Appointment List View
Open directly Appointment List View into app.ldgns.be, or use the left navigation to go to Calendars and click at the top Appointment List View to view appointments as a list instead of as a calendar block.
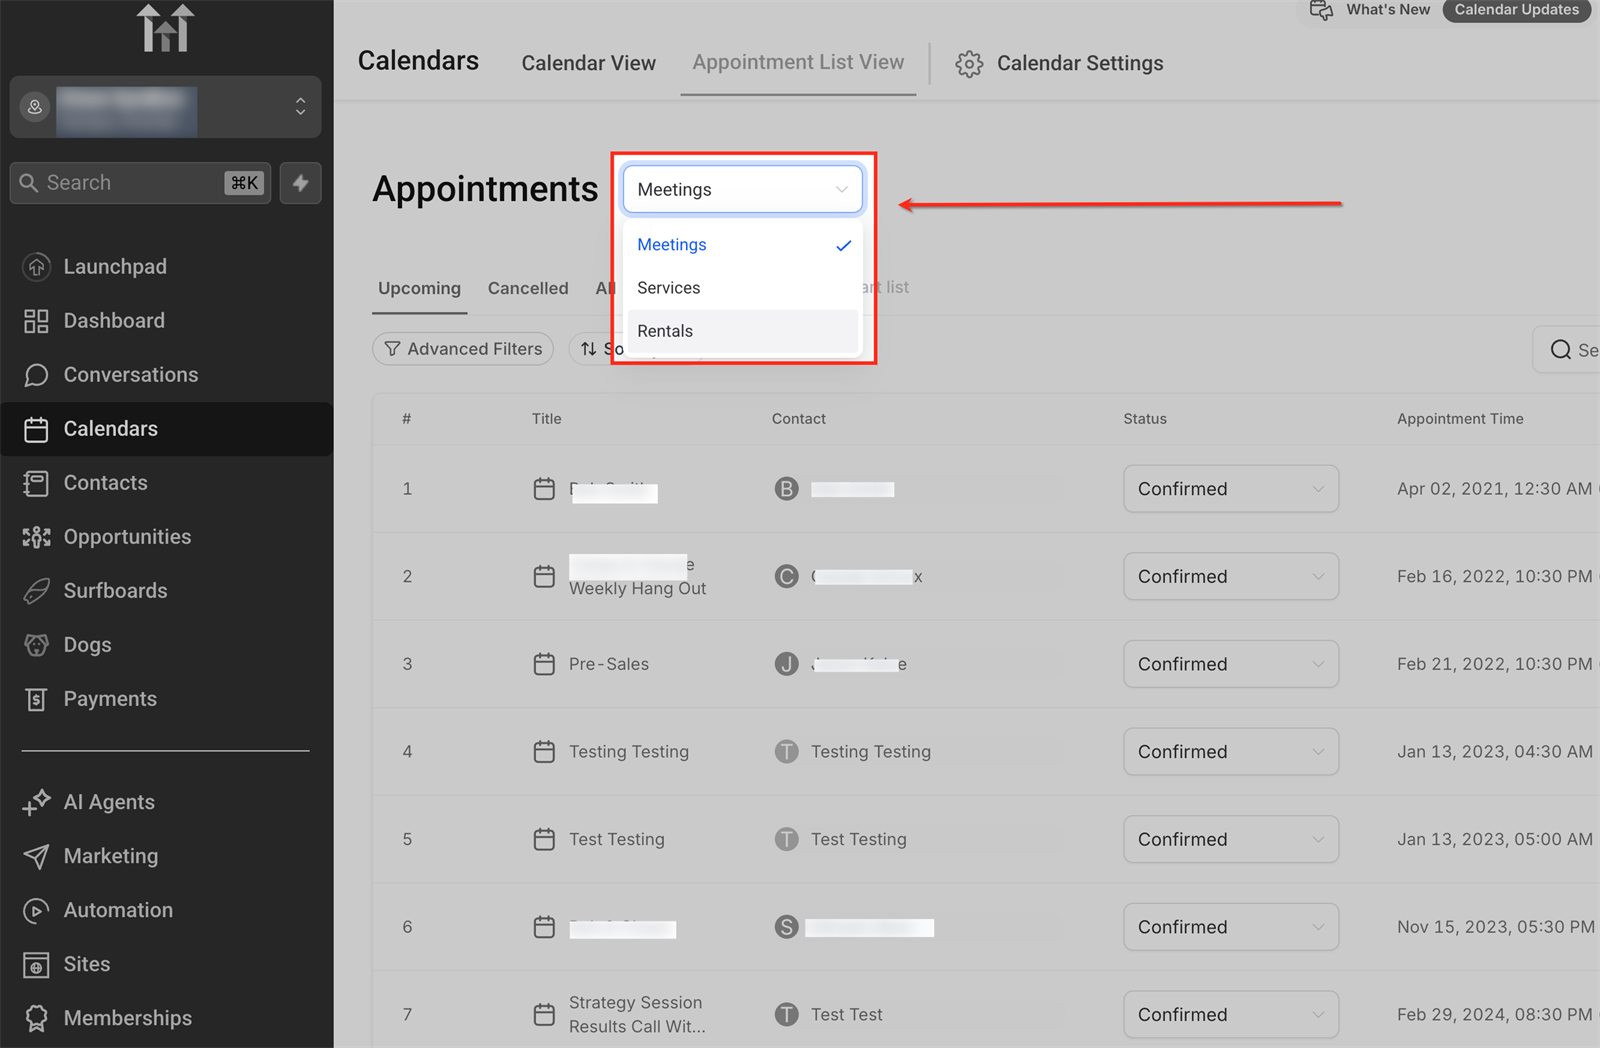
Step 2 - Choose the correct appointment type
Use the appointment type at the top of the list to determine which appointments you see. Appointments are assigned their types based on the calendar they are booked in, such as Meeting, Service or Rental.
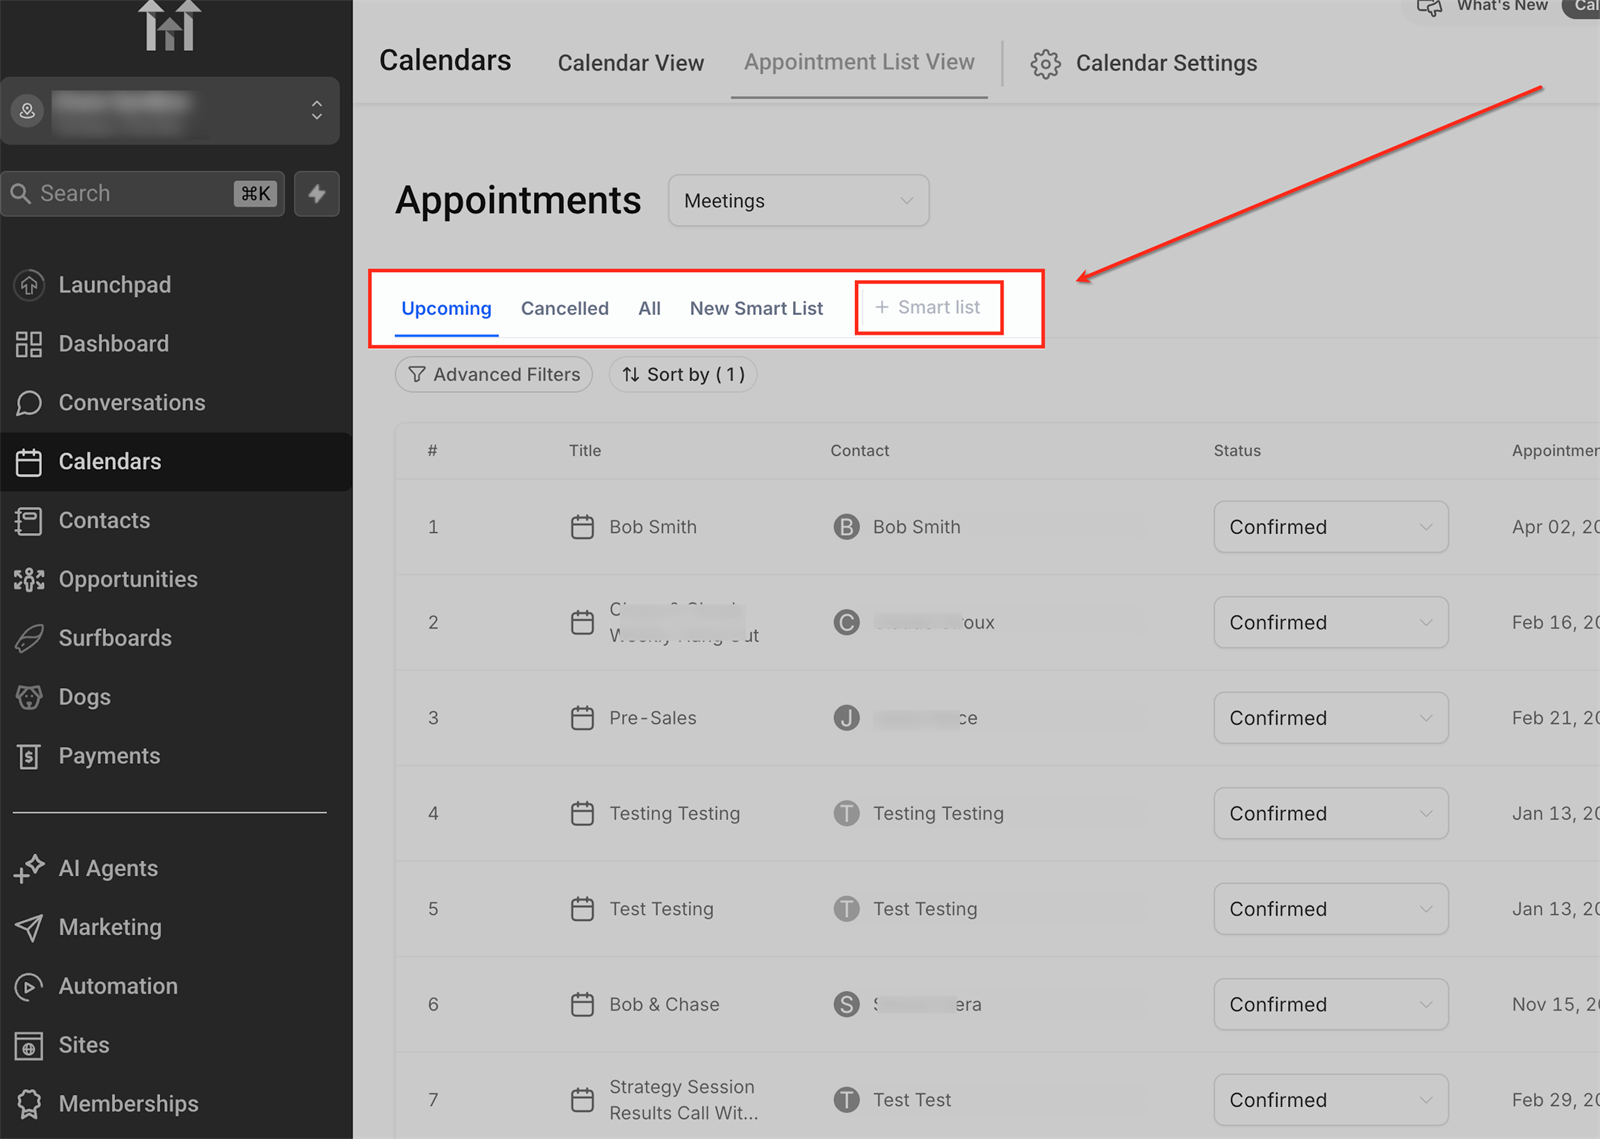
Step 3 - Use existing lists or create a Smart List
Use standard lists such as Upcoming, Cancelled and All for quick checks. Click + Smart list when you want to save your own list with fixed filters, sorting and columns.
Step 4 - Make a new appointment if necessary
Click +New Appointment to manually book an appointment from the list view. Then select the correct calendar, date, time and contact person.
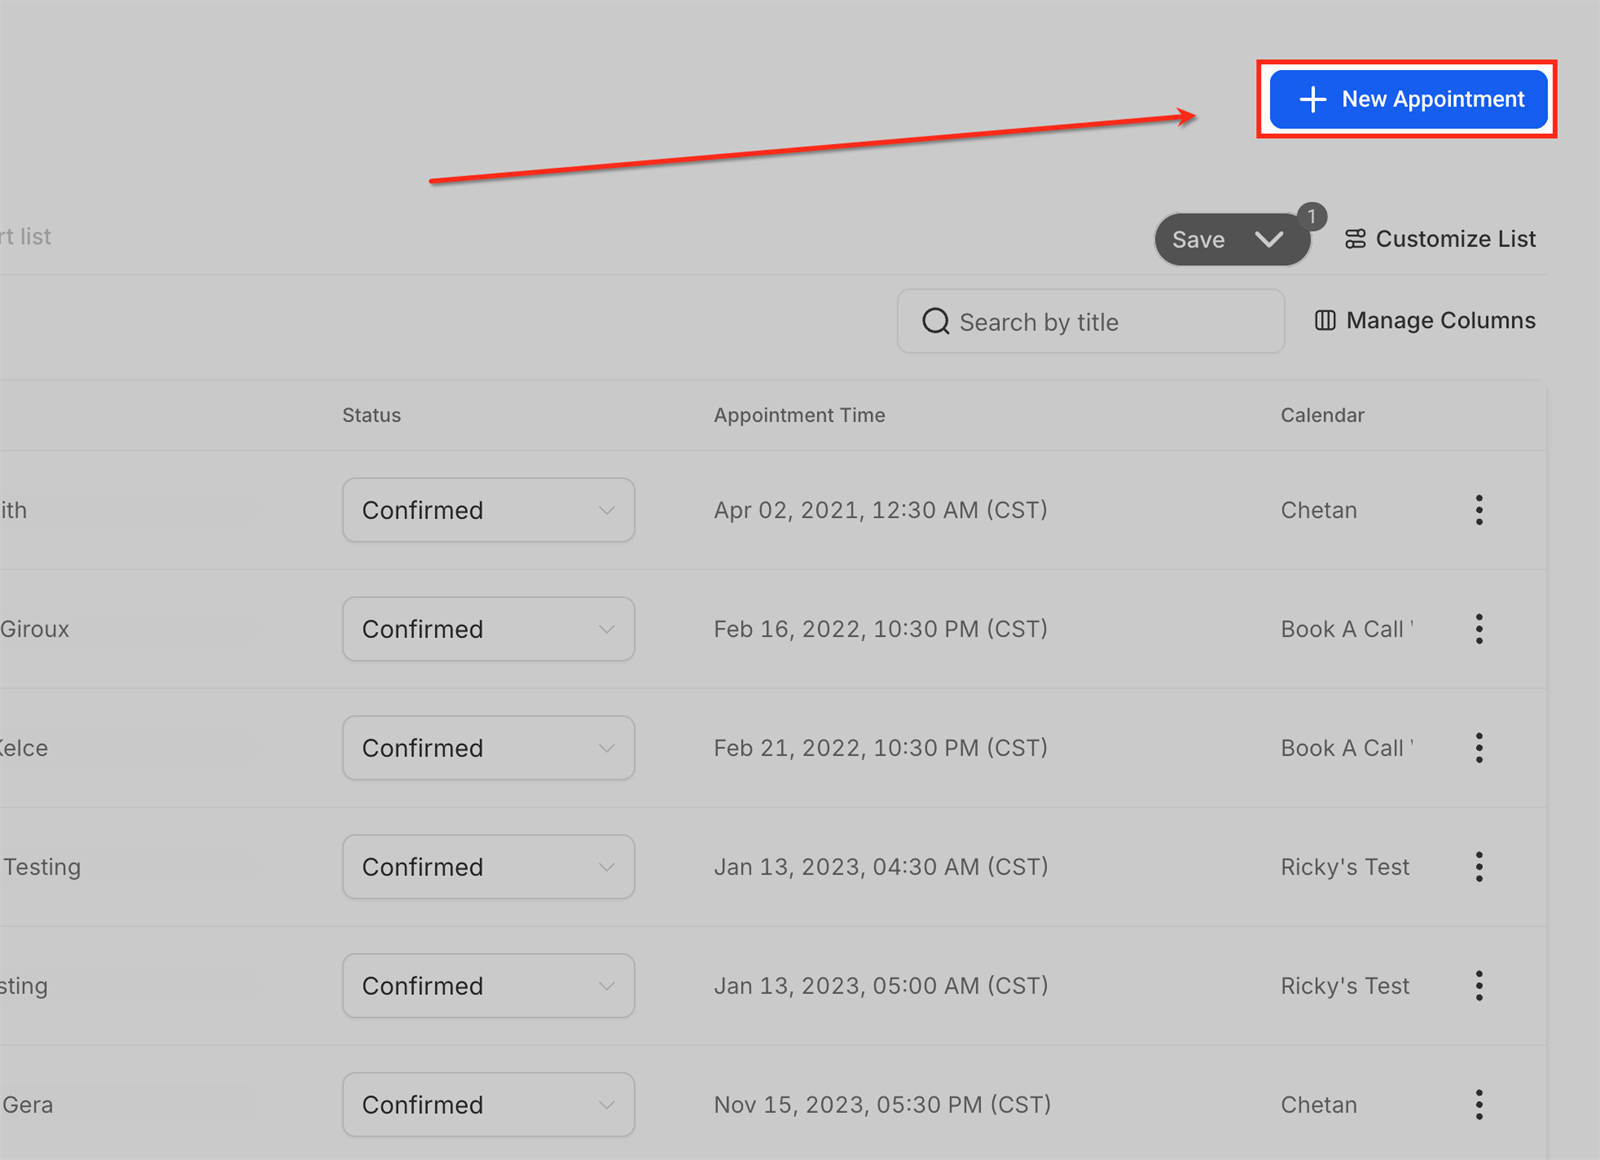
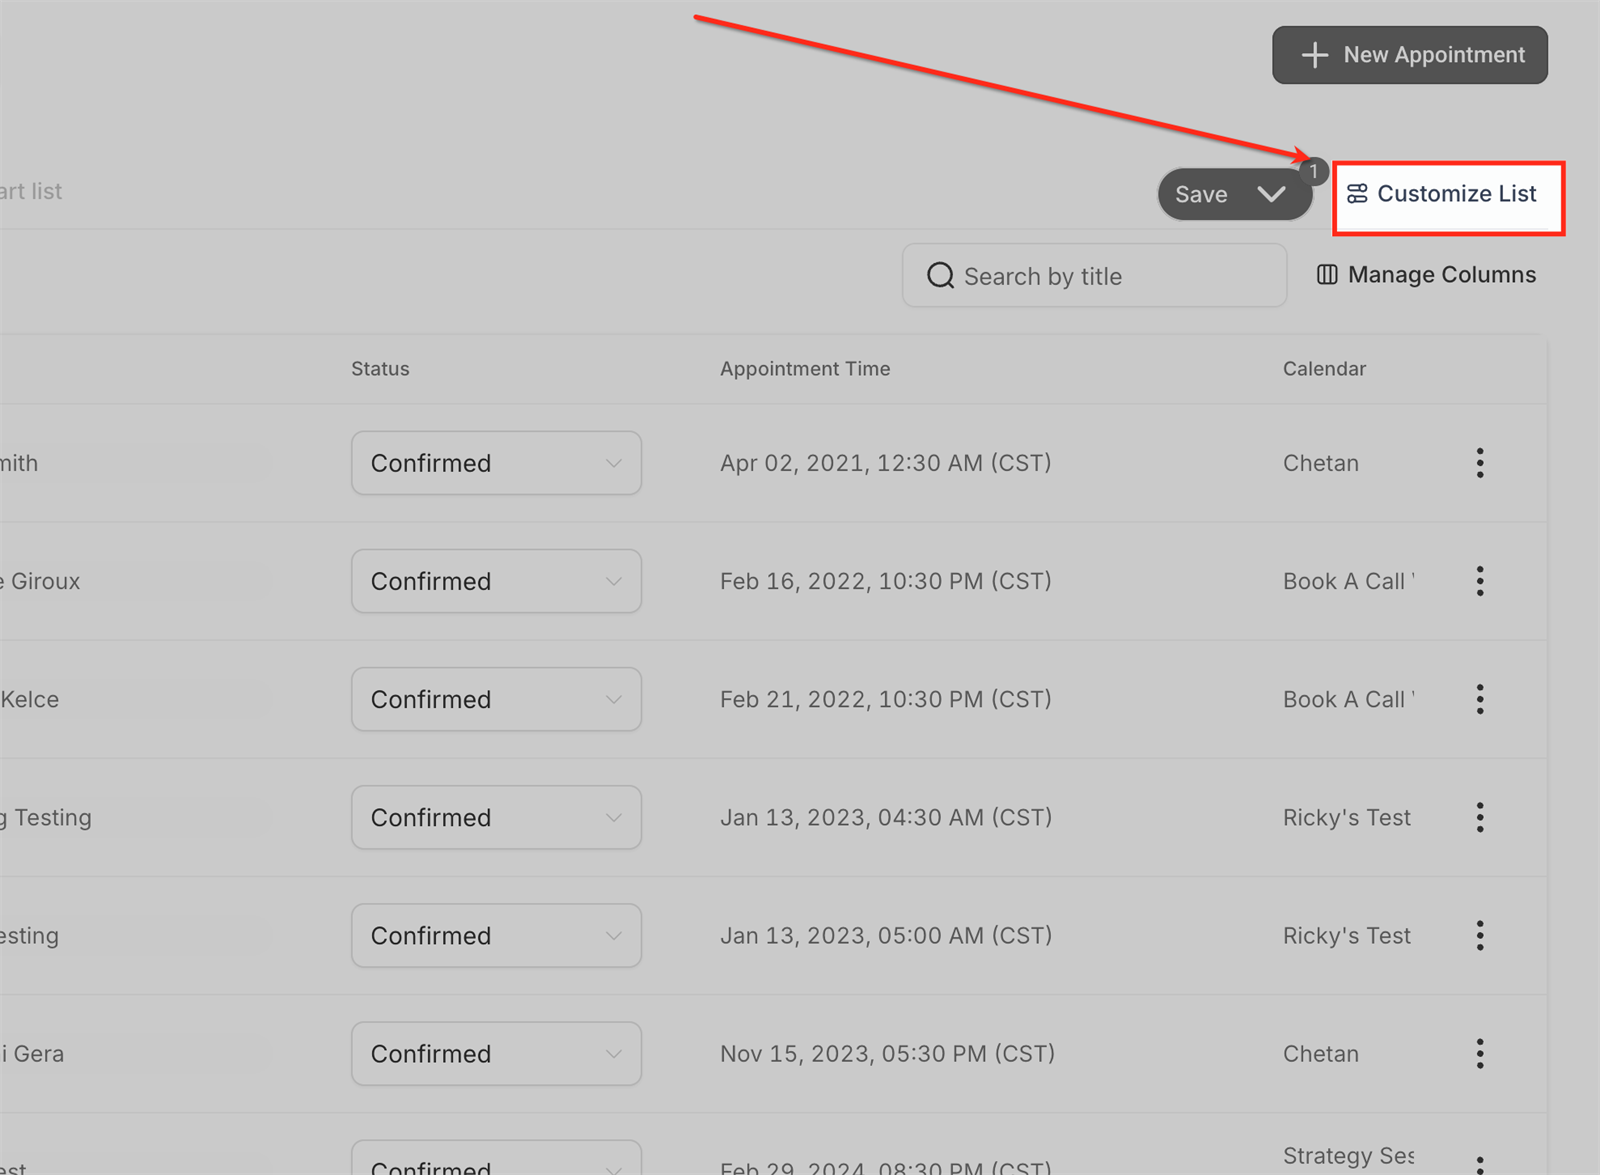
Step 5 - Open Customize List
Click Customize List to modify the current list. From this panel you can change the list name, set filters, choose sorting and manage columns.
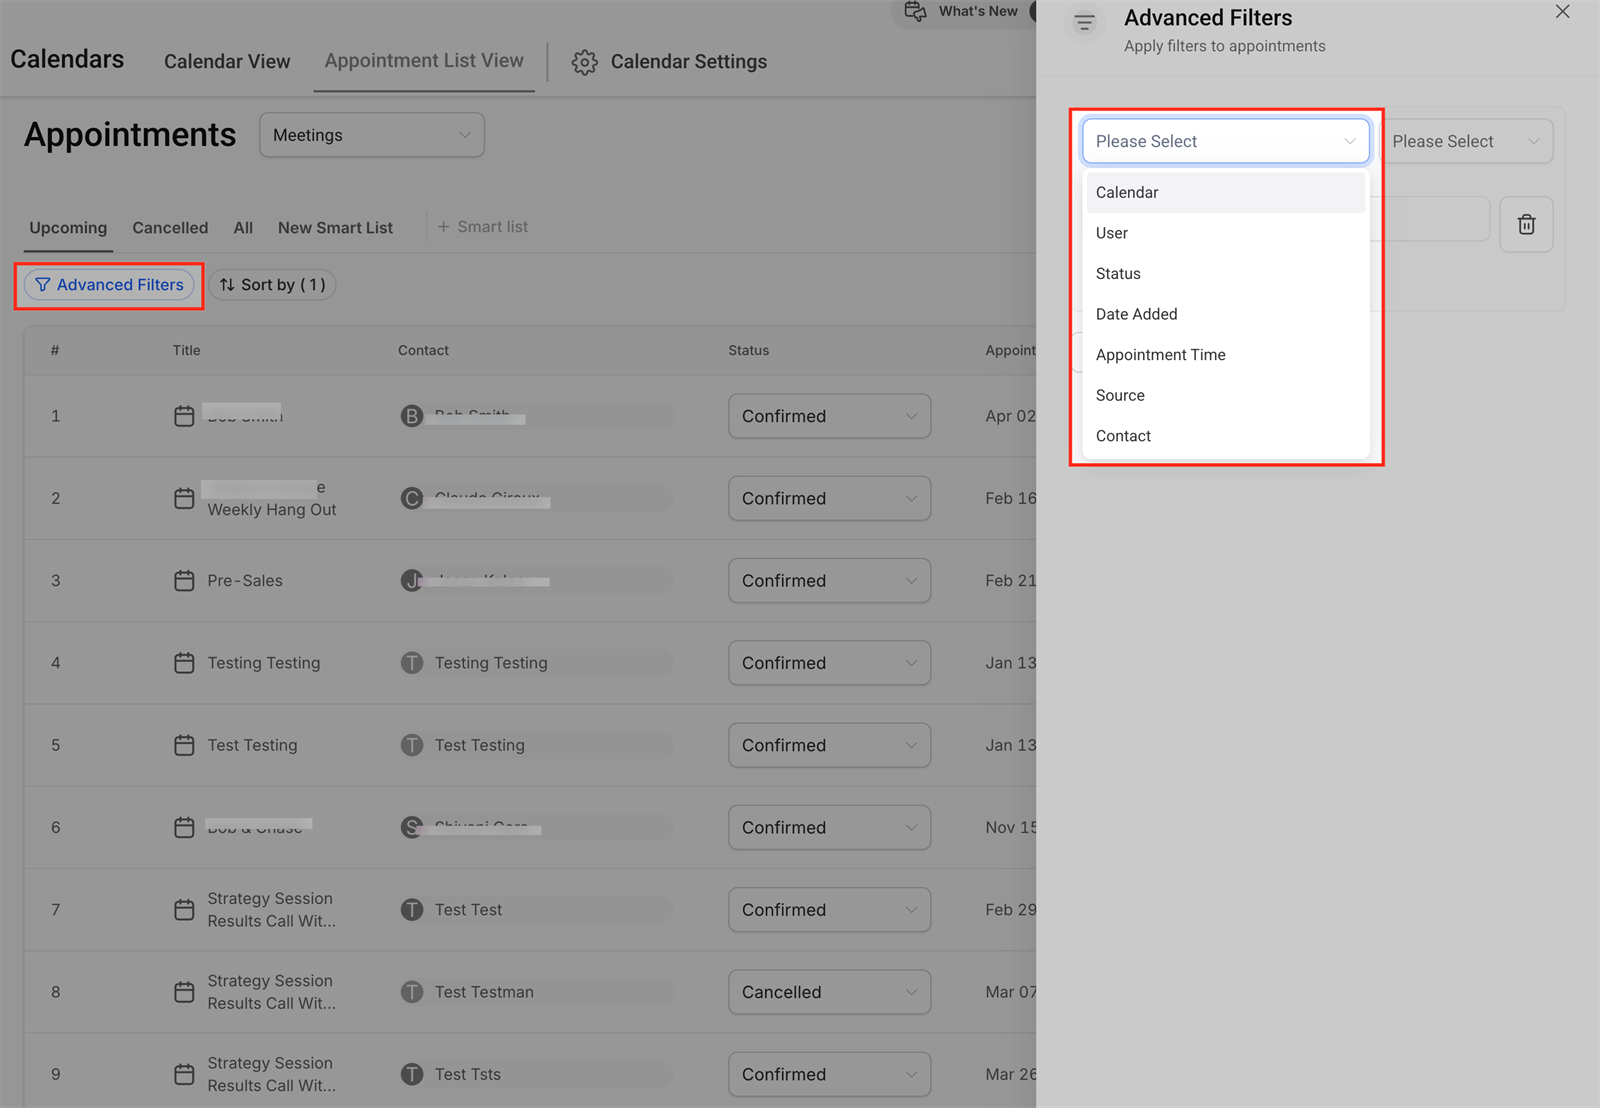
Step 6 - Set Advanced Filters
Use Advanced Filters to only show the appointments that are relevant to your workflow. For example, you can filter by status, employee, calendar, appointment date or contact details.
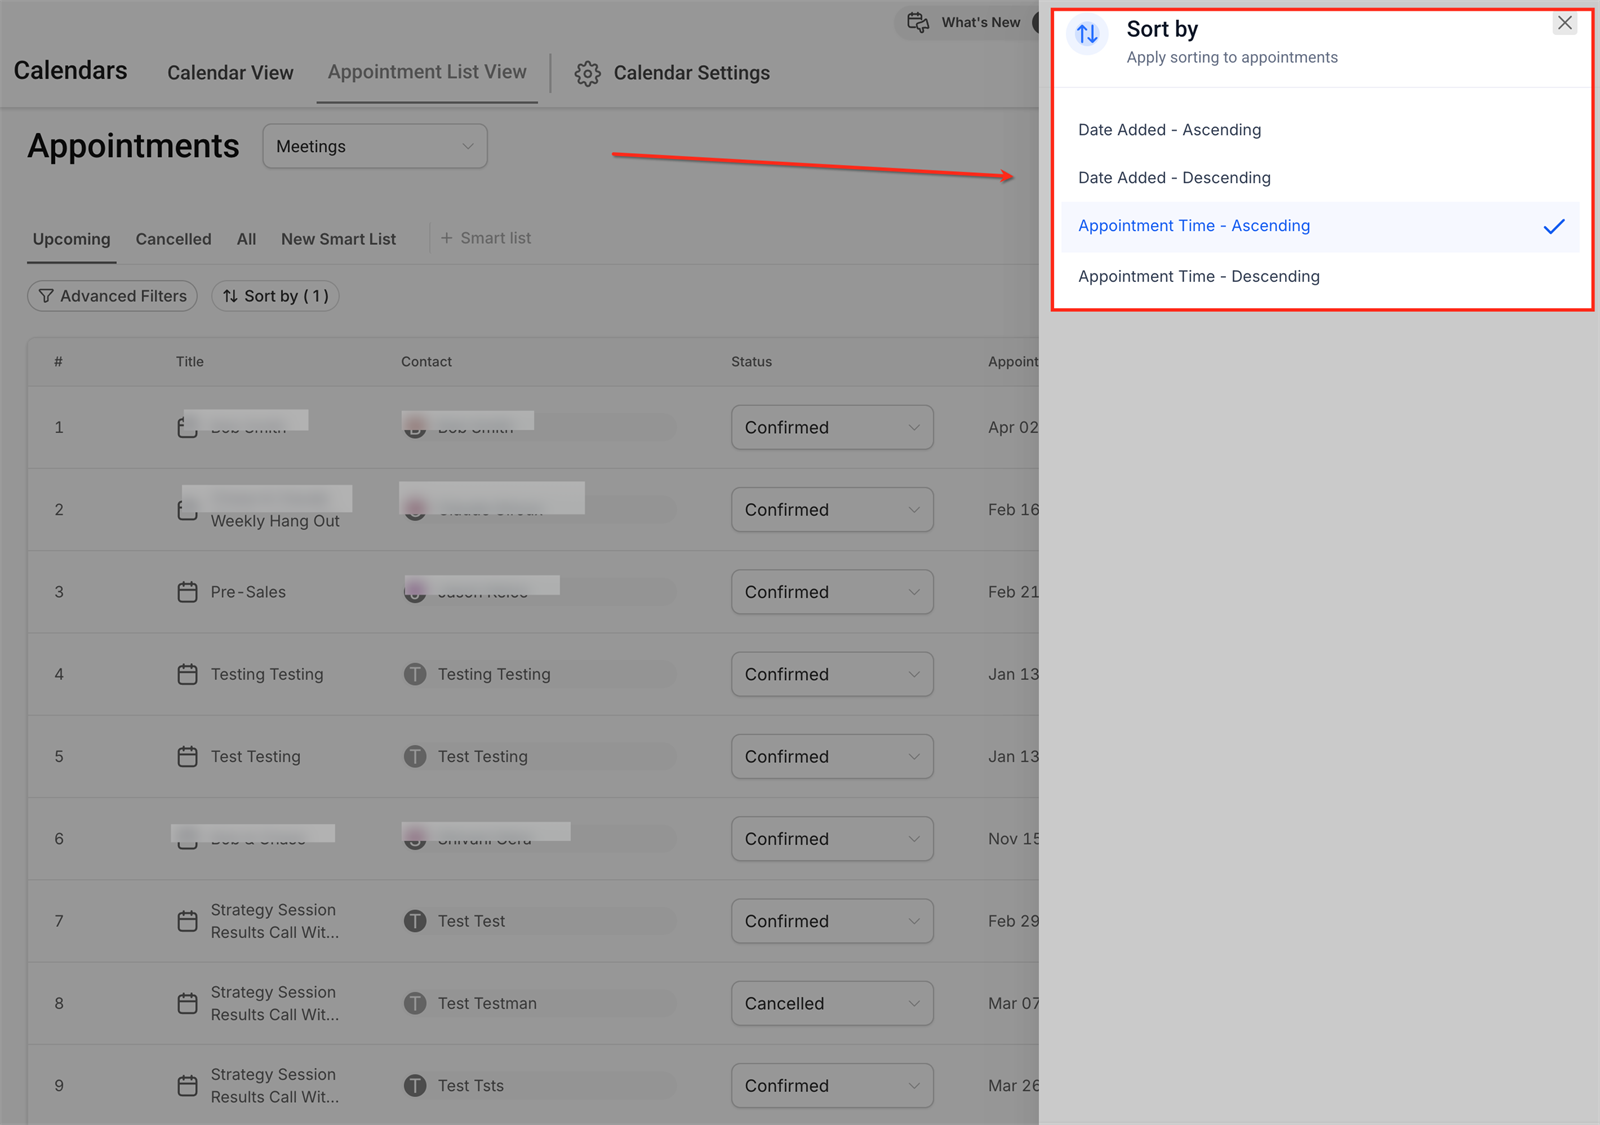
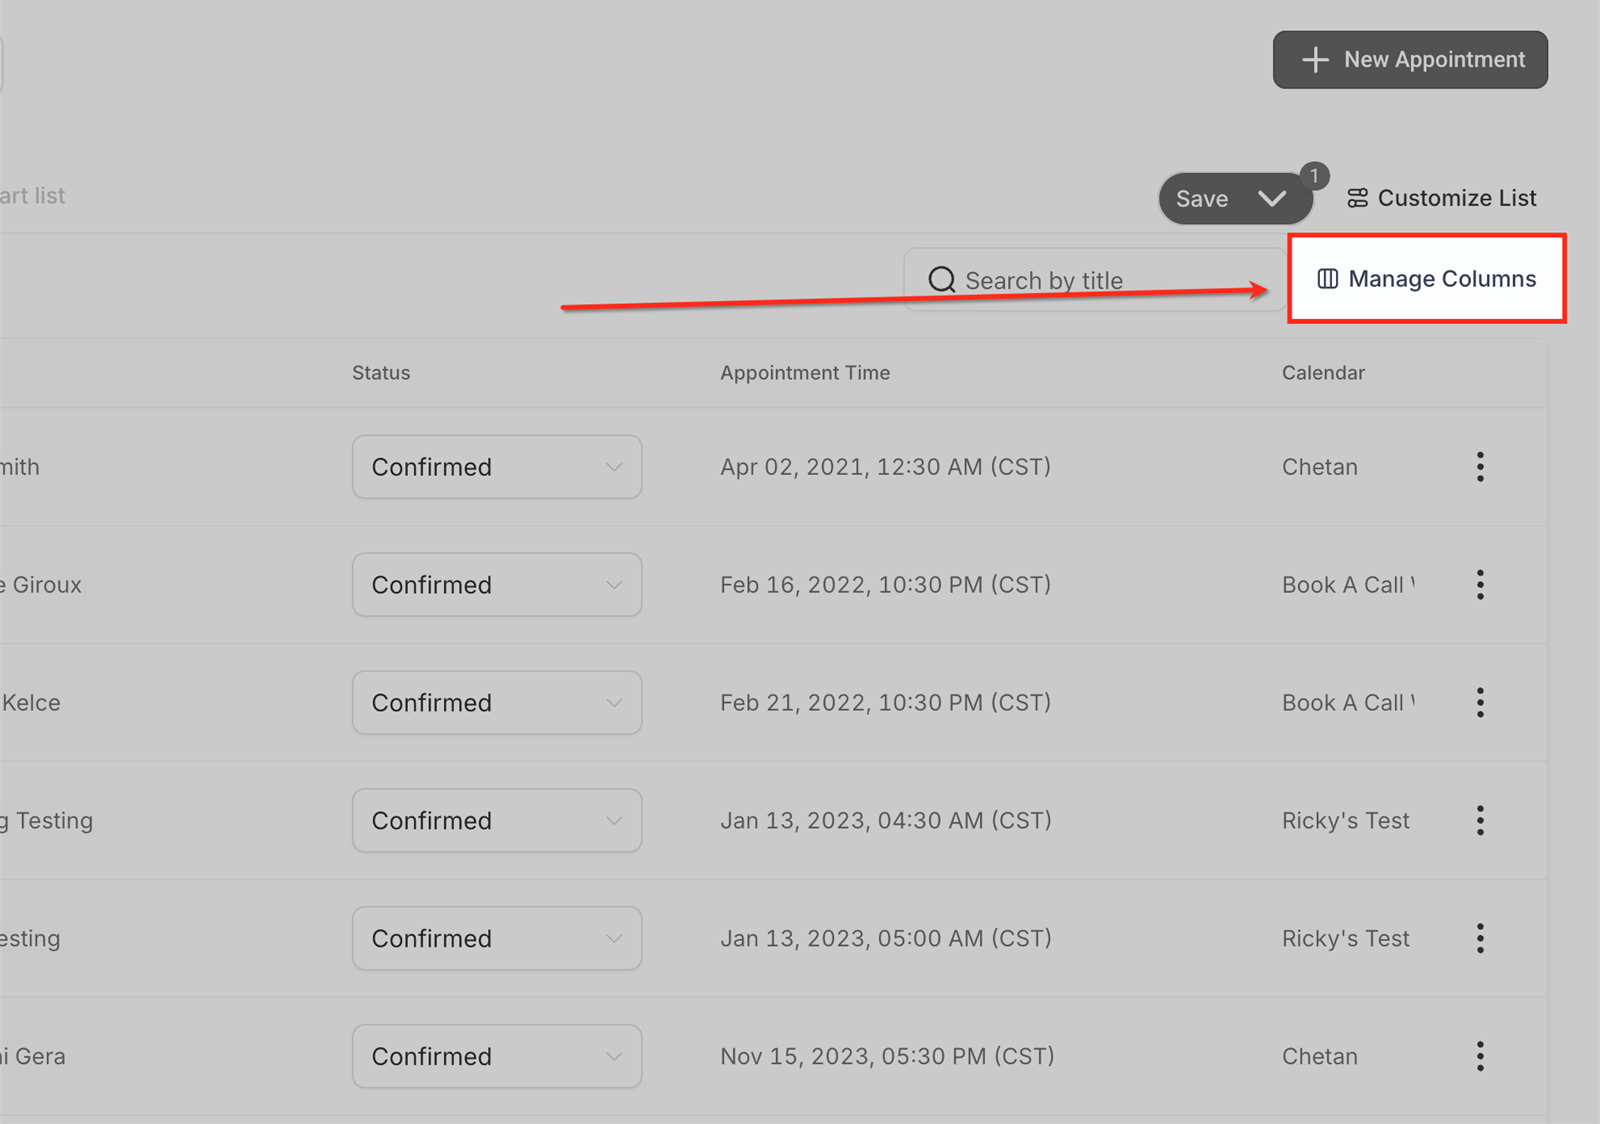
Step 7 - Choose sorting and columns
Use Sort By to determine the order of the appointments, for example by appointment time or date added. Use Columns or Manage Columns to show, hide or rearrange fields.
Step 8 - Update status or appointment details
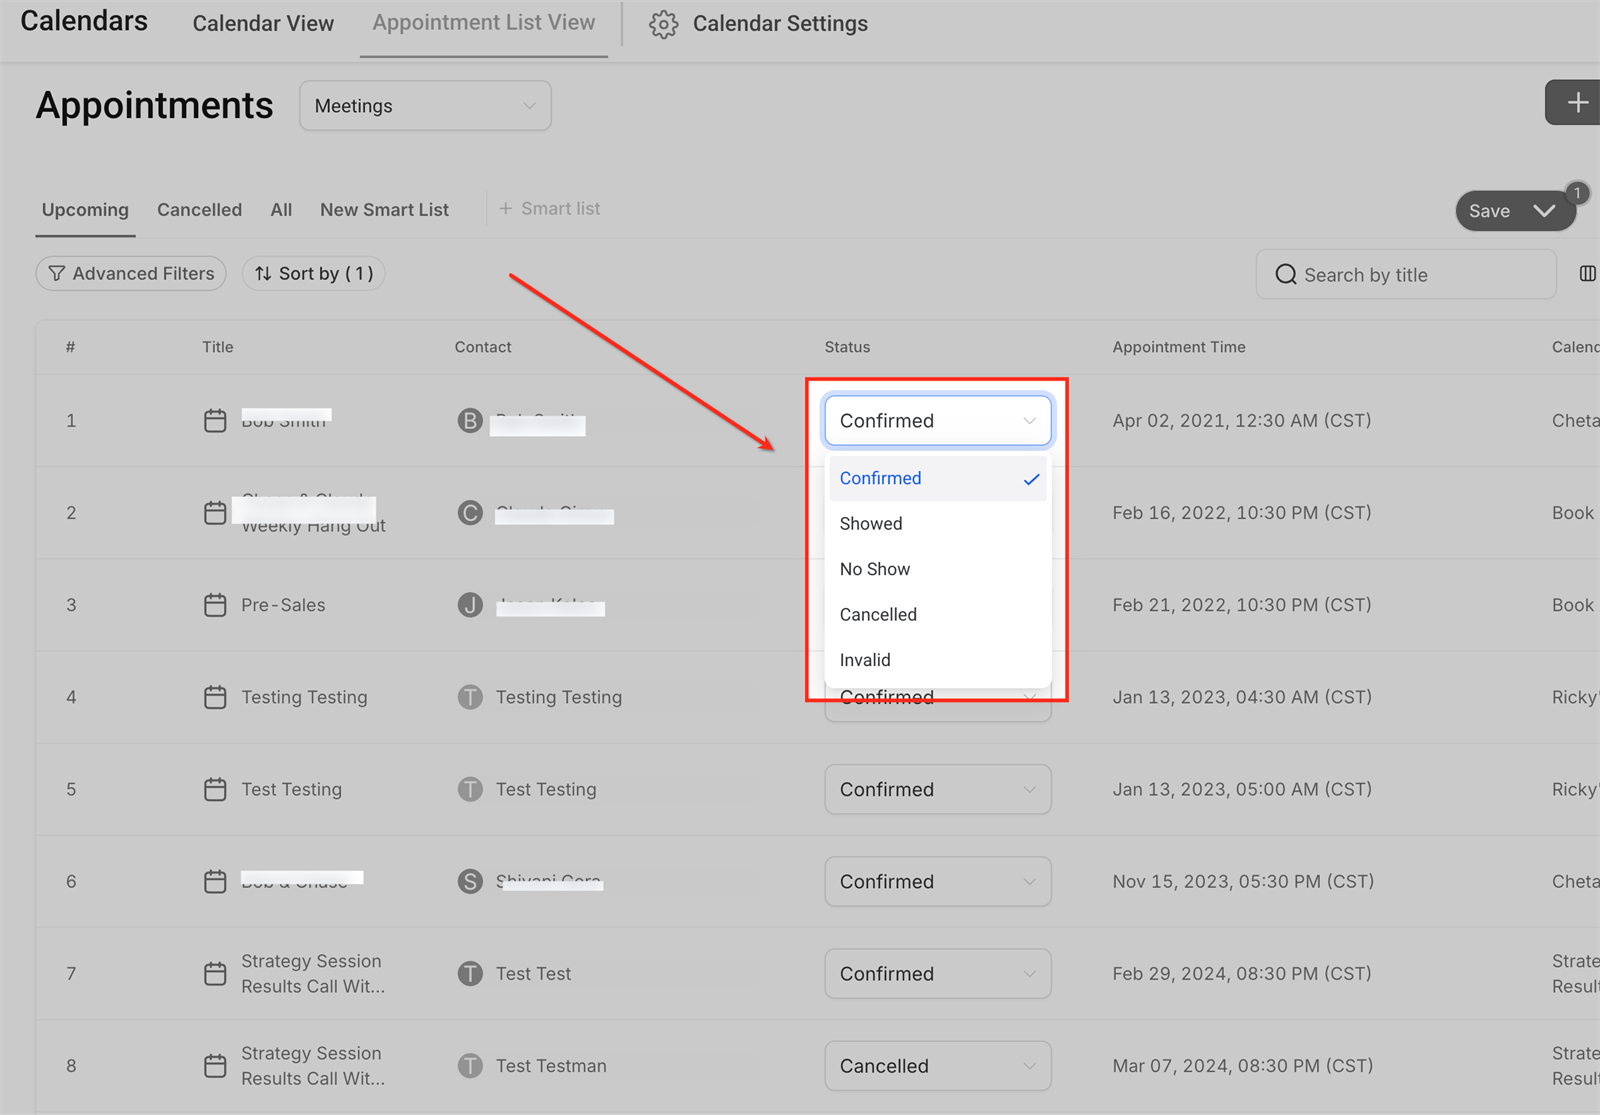
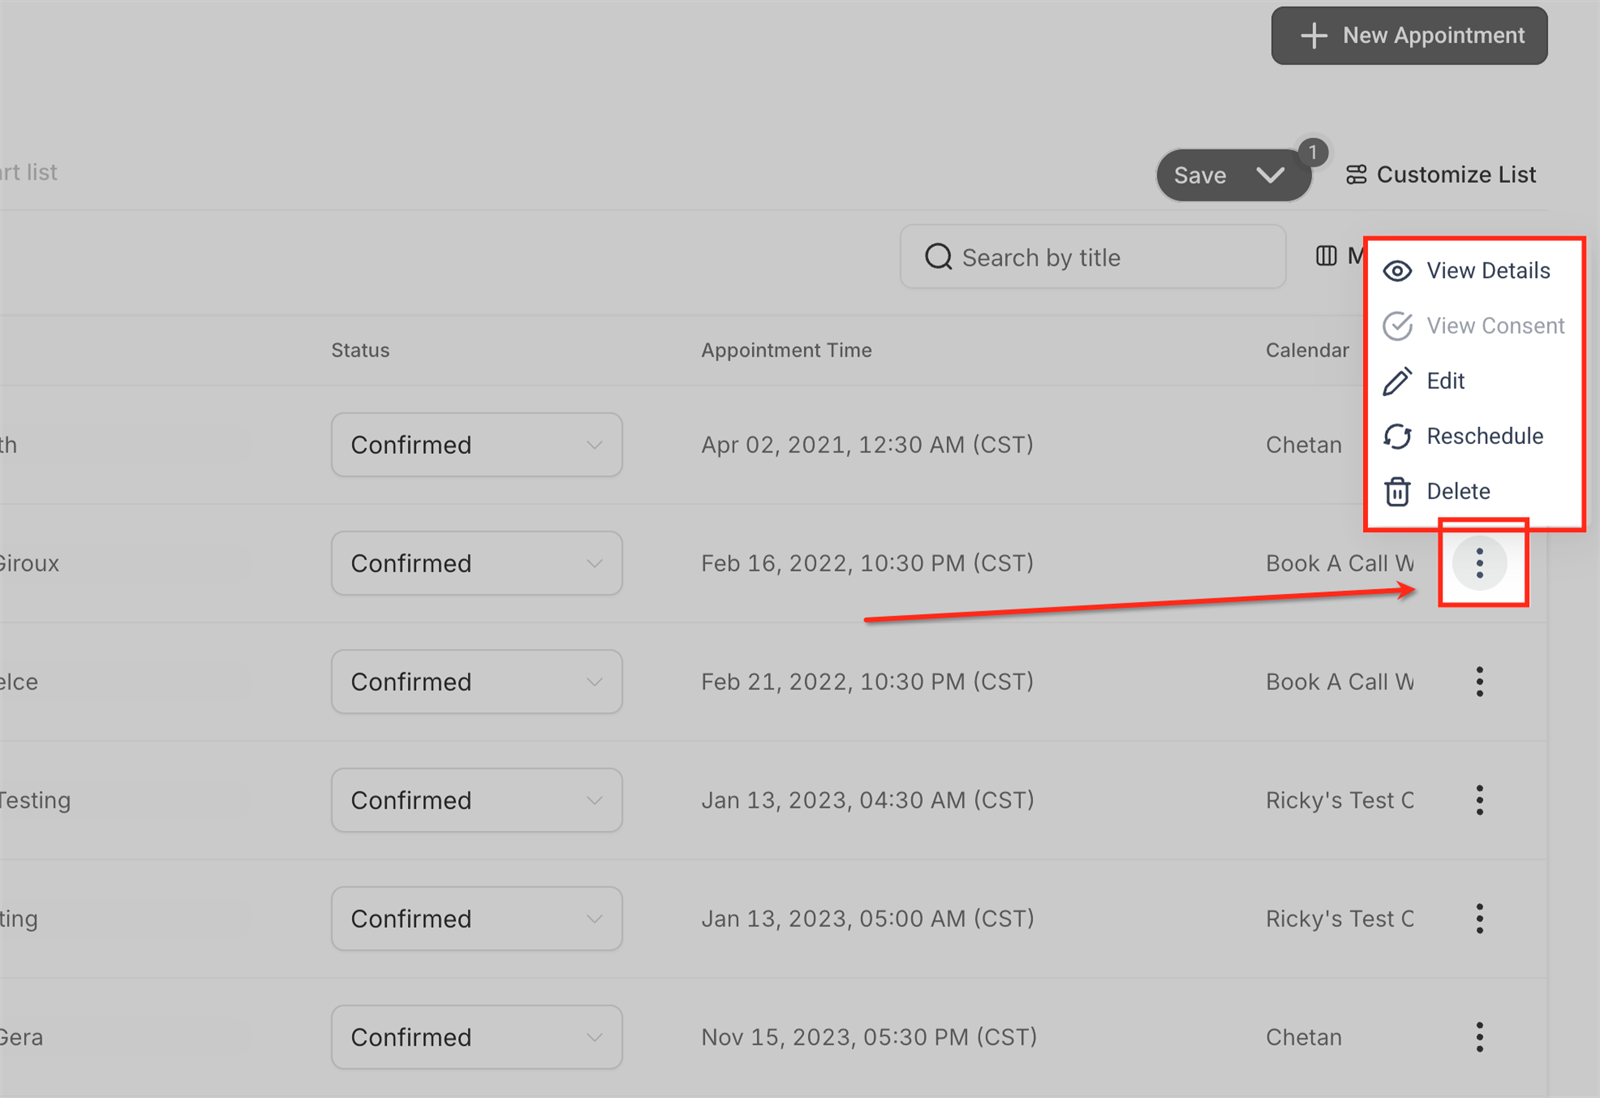
Use the status choice in the row to quickly mark an appointment as example Confirmed, Showed, No Show, Cancelled or Invalid. Open the three-dot menu for additional actions such as viewing details, editing, moving, or deleting.
Common problems
Check the selected appointment type, active filters and the selected Smart List. An appointment can be hidden if it does not meet all filter conditions.
Calendar View is for viewing appointments by date and availability. Appointment List View is intended to manage, filter and track appointments in bulk.
A Smart List saves the combination of filters, sorting, and columns so you can reopen the same work view later.
The visibility of Smart Lists may depend on permissions and account settings. Check user rights if lists are not visible to everyone.
Yes, you can delete an appointment via the three-dot menu if you have permission to do so. Deletion is final, so first check contact, date and calendar.