
Contacts & tasks
Create and manage tasks
Use tasks when someone from the team needs to follow up on something later, such as calling a lead back, checking an appointment or checking additional information.
Brief overview
Create a task preferably from the place where you are working: the conversation in Conversations or the opportunity in the Pipeline. This keeps the task linked to the correct lead or opportunity right away.
Use Tasks in app.ldgns.be mainly as an overview to check, search or filter open tasks.
A good task has at least a clear title, a short description and a due date. Assign someone when the follow-up does not clearly belong to you.
Step-by-step plan
Step 1 - Start from Conversations
Open Conversations, choose the correct conversation and click the Tasks icon on the right. Then use Add task to link the task to this contact.
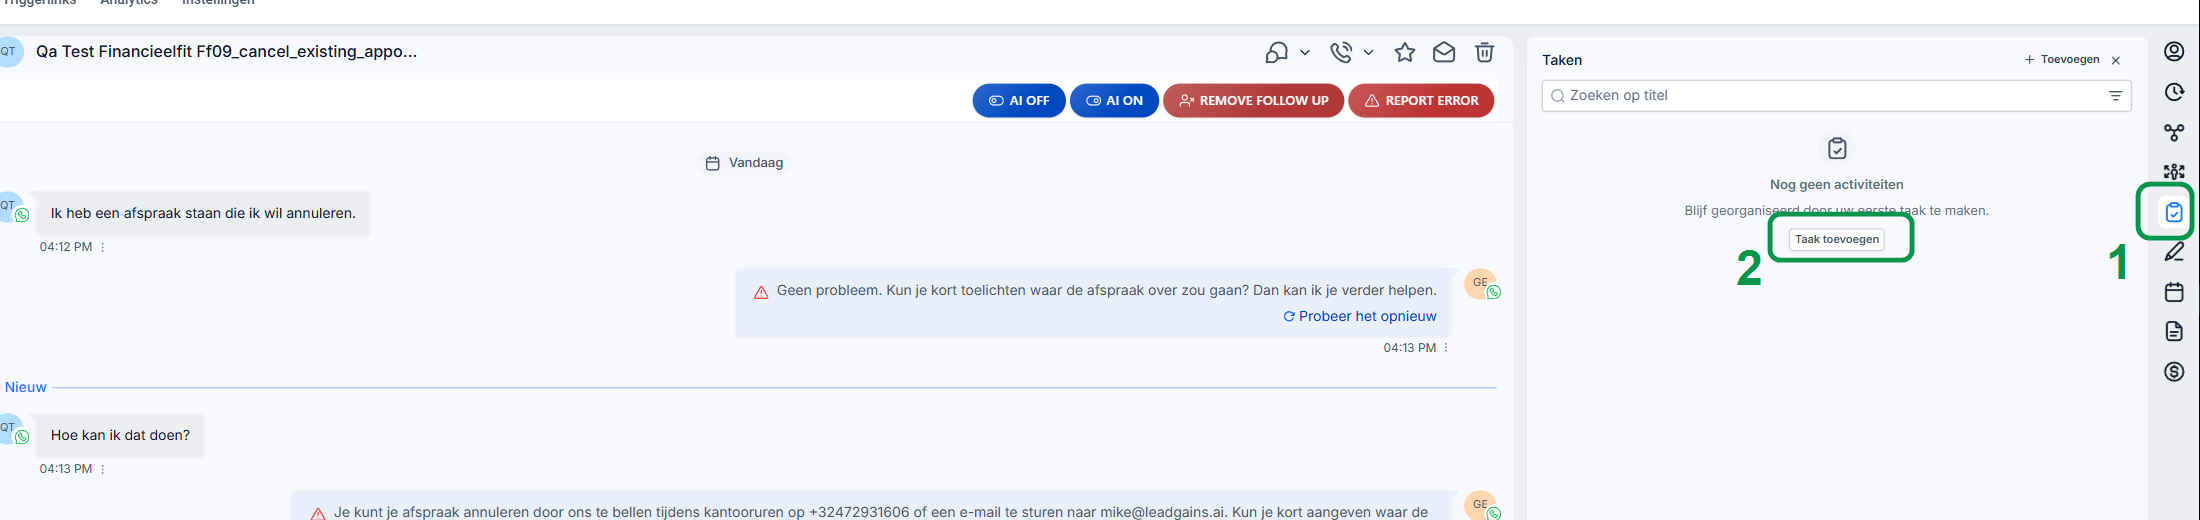
Step 2 - Start from the pipeline
Open Leads and go to the pipeline. Each opportunity card has a small action row; use the Tasks icon there to create a follow-up task for that opportunity.
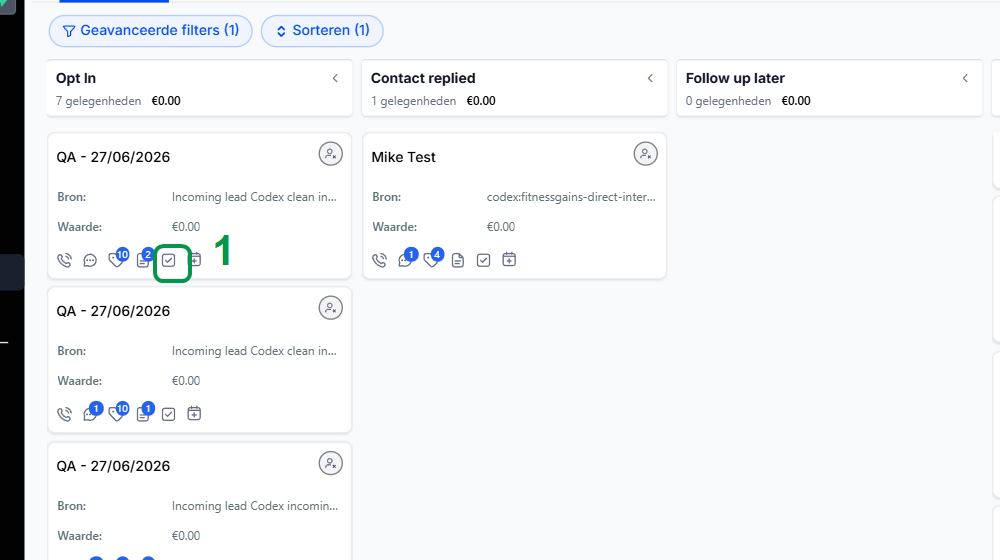
Step 3 - Use the task list as an overview
Click Contacts on the left, then click Tasks at the top. There you can see all open tasks and also create a separate task via Add Task.
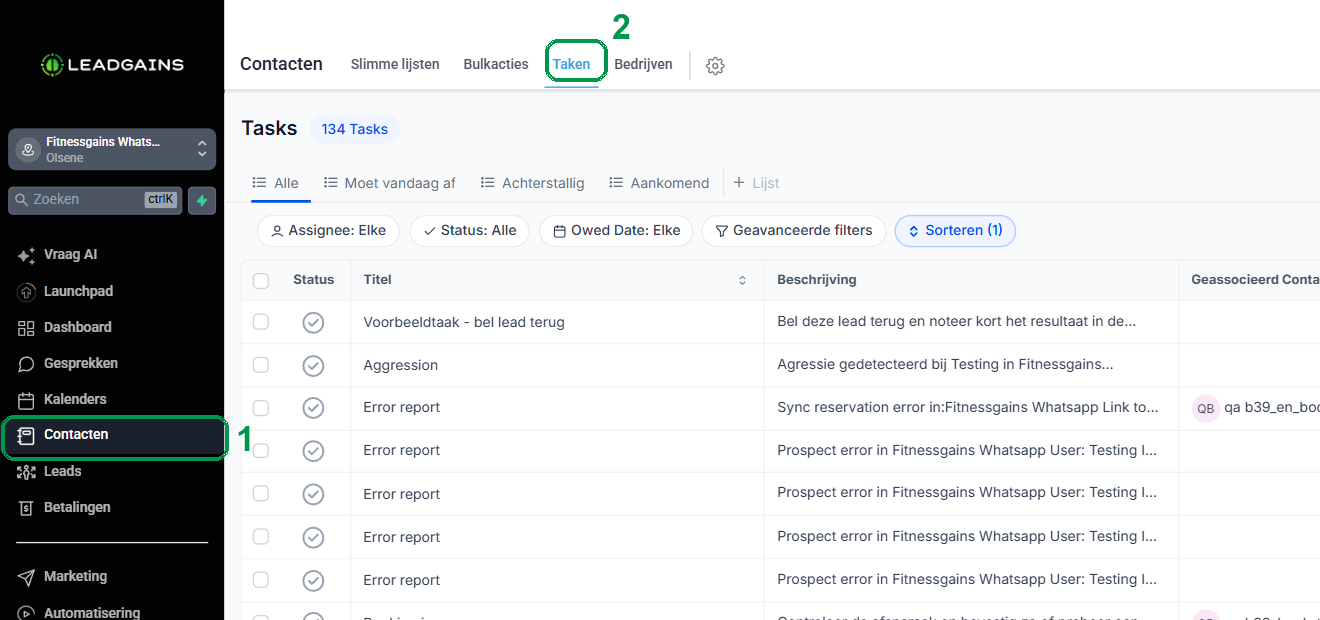
Step 4 - Fill in the task clearly
Give the task a short title that immediately makes it clear what needs to be done. Add additional context to the description, for example why someone should call back or what needs to be checked.
Choose a Due date and time. Turn on Set up recurring tasks only when the same task must repeat at fixed times.
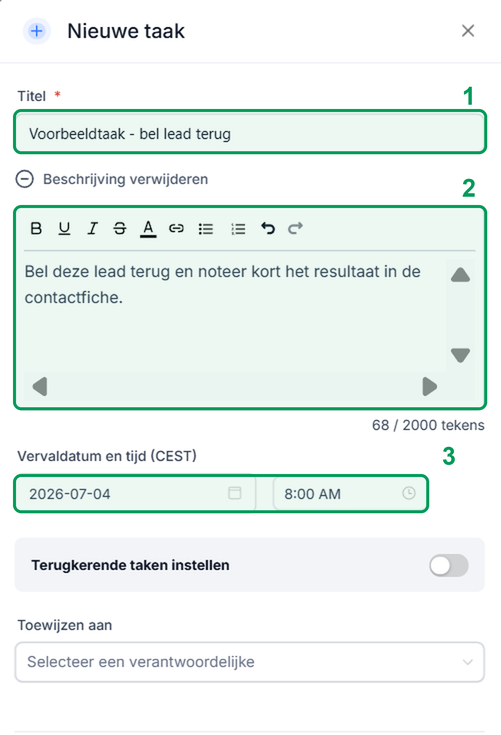
Step 5 - Link an assignee or contact when needed
Use Assign to when a specific employee needs to follow up on the task. Use Associate with when the task belongs to a contact, opportunity, or other object. If you start from Conversations or the pipeline, that link is usually already filled in.
Step 6 - Save the task
Click at the bottom right Save. If you want to immediately create a similar task, use Save and add another.
Step 7 - Search or filter the task afterwards
Use the search bar to search for the title. You can also filter by person responsible, status or due date, for example to see tasks that are due today or are overdue.

Common problems
Check that you are in the Contacts module. The Tasks tab is at the top next to Smart lists and Bulk actions.
Check that the title is filled in. Also enter a specific due date and time when the task must be completed at a certain time.
Leave Assign to empty if it is not yet clear, but state in the description who should normally take on the task. Update it later once the assignee is known.
Search for a word from the title and check the filters Assignee, Status and Owed Date. Too tight a filter can hide tasks.
Use a task when someone still needs to do something. Use one note when you only want to keep context for a contact.