Calendars & appointments
Make an appointment from the calendar tab
Use this how-to when you're from Calendars would like to schedule an appointment for a contact yourself. Are you already working in a conversation? Then use the separate manual Make an appointment from Conversations.
Brief overview
From the calendar tab you can visually choose a free moment and immediately make an appointment. This is useful when you need a calendar overview, want to check an employee calendar or want to place an appointment directly in the calendar.
The appointment module then asks for the same basic information: calendar, contact, date, time, title and location. If you want to book the appointment while you are already chatting with someone, follow Make an appointment from Conversations.
Supplies
- An existing contact for whom the appointment is made.
- The right calendar or team member calendar.
- The desired date, time, duration and location of the appointment.
- A meeting link or address when using a custom location.
Step-by-step plan
Step 1 - Open Calendars
Open directly Calendars into app.ldgns.be, or click on the left in Leadgains Calendars. Then open Calendar View.
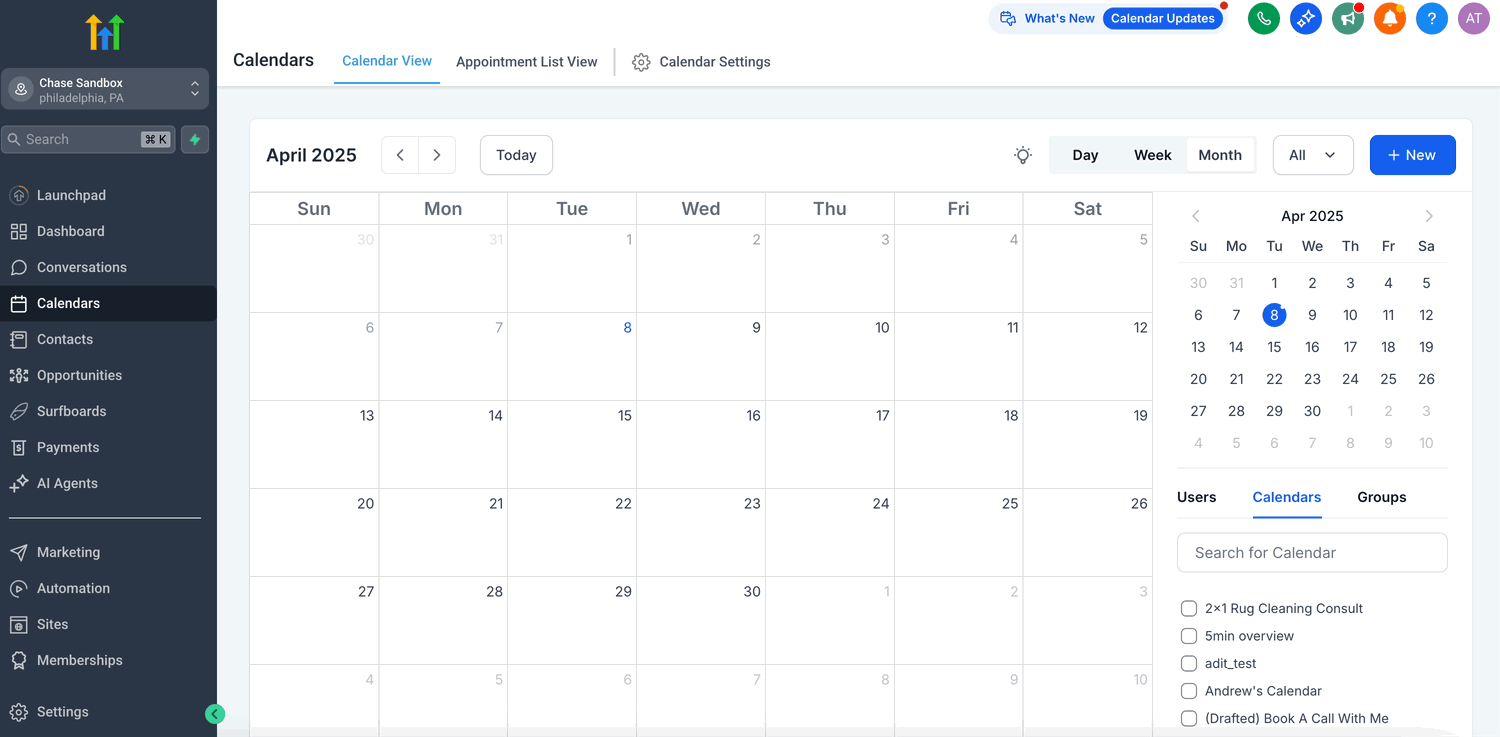
Step 2 - Start a new appointment
Click +New or click directly on the desired time slot in the calendar. Use +New if you first want to fill in all appointment details. Click on a time slot if you already know when the appointment should take place.
Step 3 - Select calendar and contact
In the appointment module, choose which calendar should be used. Then find the right contact and check whether the appointment is linked to the right person.
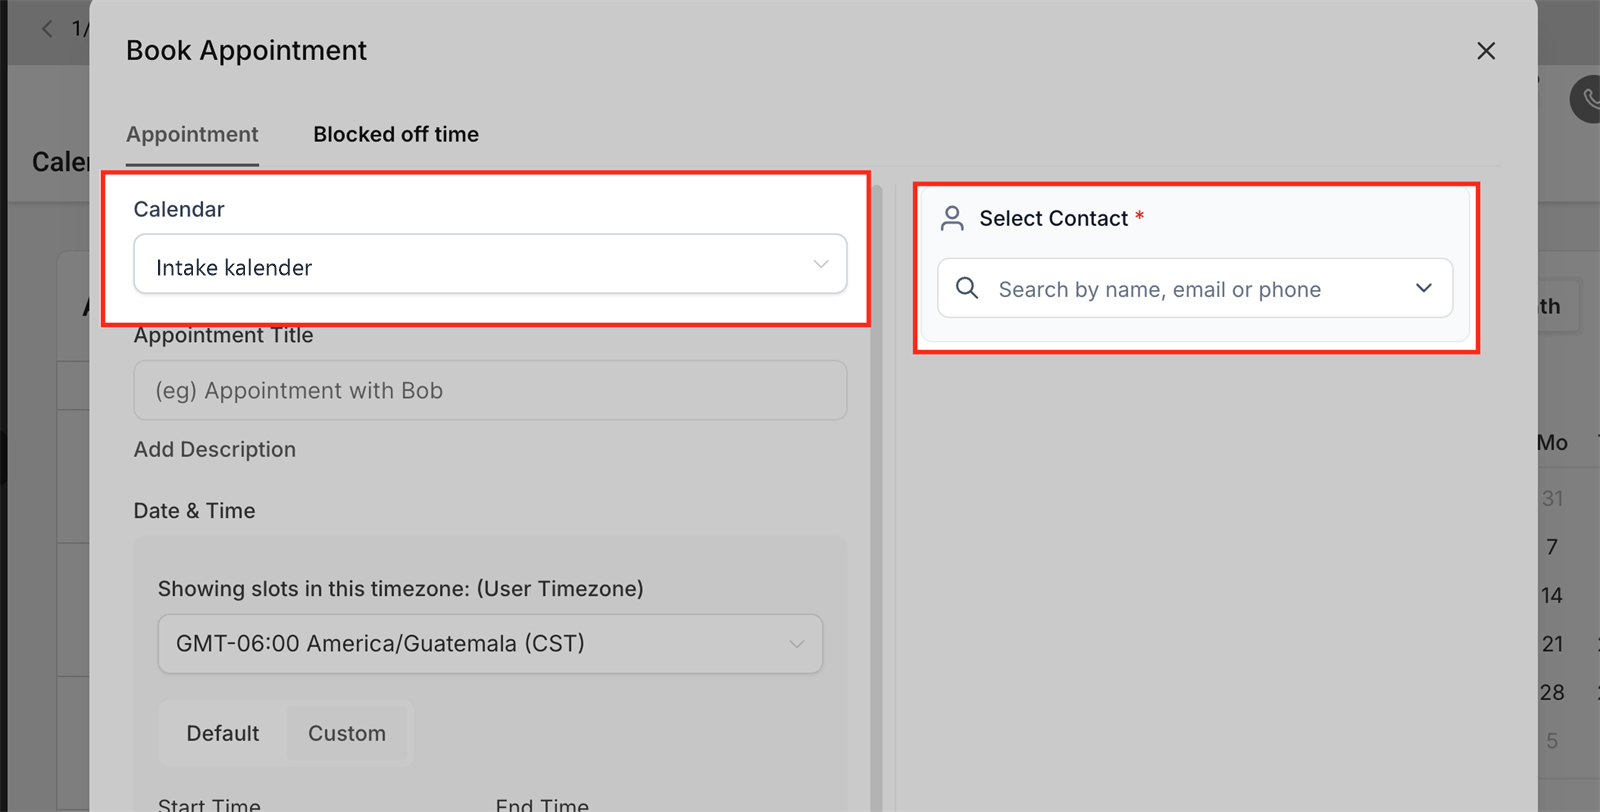
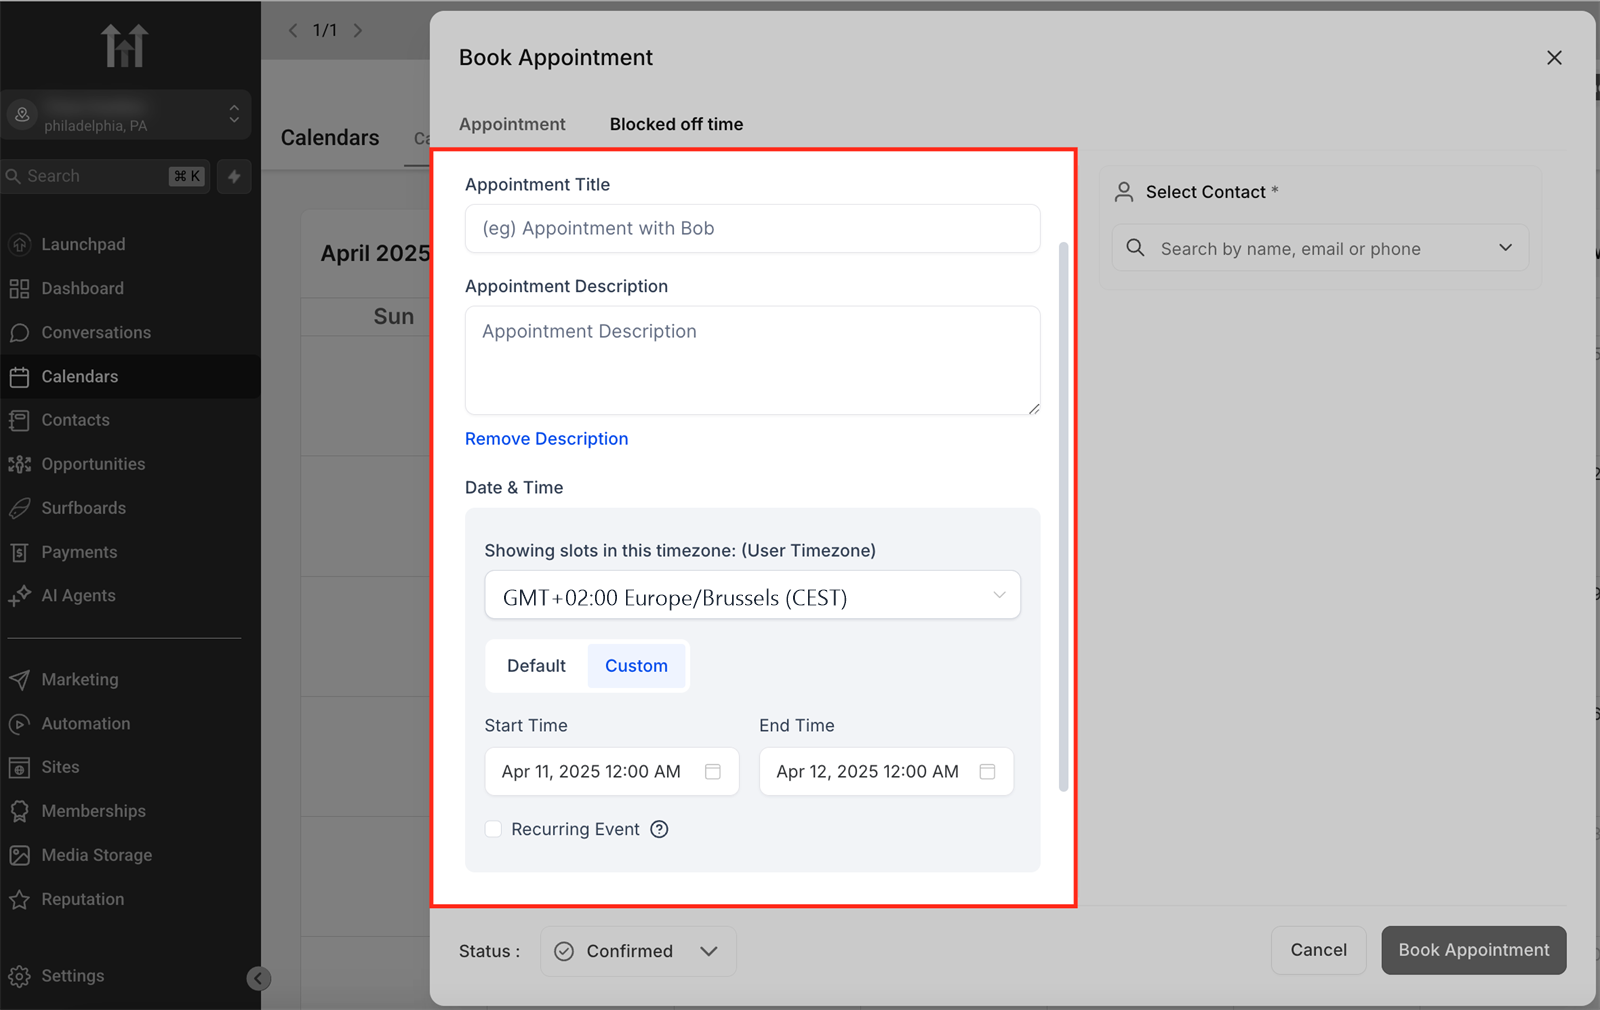
Step 4 - Fill in the appointment details
Enter a clear title and choose date, start time and end time. Also check the location. Use a default location when available, or choose a custom location for things like a Zoom link, Teams link, or physical address.
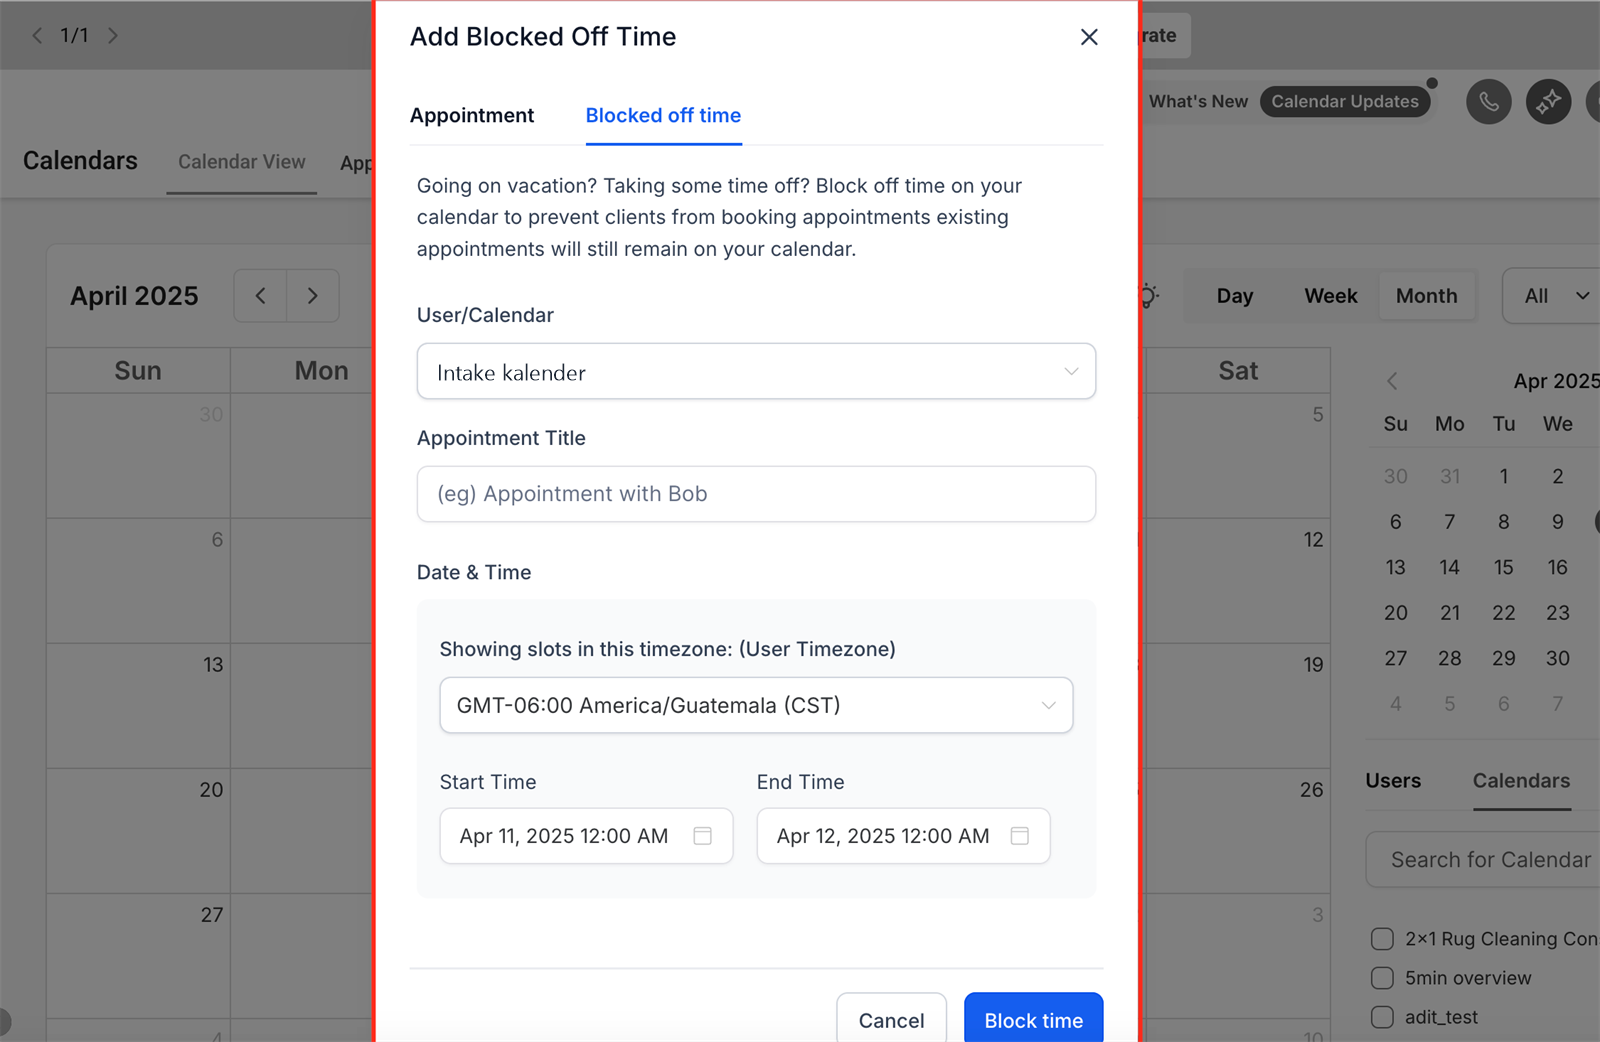
Step 5 - Block out alone time when you don't make an appointment
Use Blocked Off Time only when you want to block availability, for example for breaks, training, leave or internal consultation. This does not create a customer appointment, but does prevent new appointments from being booked in that period.
Step 6 - Save the appointment
Check all details one last time and click Save or the relevant save button. The appointment will then appear in the chosen calendar and on the linked contact form.
Common problems
Check whether you are viewing the correct calendar and whether any filters are active in Calendar View. Also look at the contact sheet at Appointments.
Then use the separate SOP Make an appointment from Conversations. This page is specifically about making appointments from the calendar tab.
Open the appointment details and check which contact is linked. Please reschedule if the wrong contact form was used.
Check the availability of the calendar, any conflict calendars, existing appointments, buffers and blocked-off time.
Yes, as long as you have access to that employee's calendar. Select the correct calendar or team member in the appointment module.
No. Blocked-off time prevents new bookings during that period, but existing appointments remain in place.