Opportunities & pipeline
Opportunities and manage pipeline
Use this SOP to properly read the pipeline, understand what each column means, and safely move an opportunity to the correct stage or status. Open the page via Opportunities into Leadgains.
Brief overview
Opportunities show where leads are in the follow-up. At the top you see the active pipeline and below it the various internships, from initial interest to intake, no-show, cancel or DBR follow-up.
By default the screen shows the Open opportunities. These are leads that are still actively in the pipeline. Opportunities with status Lost or Abandon are not always shown by default. Use the filters and search bar if you cannot immediately find a contact.
You can open an opportunity card to check or edit the contact details, opportunity name, pipeline, stage, status, value, owner, followers and source. You can also drag cards directly across the board. After a change, it may take a while before the card visibly moves to the new column or status.
Video explanation
Check out the walkthrough if you want to see how to open maps, change stages, drag maps, and set a lead on Won.
This video is in Dutch. Click the gear icon in the video player, turn on Closed Captions and choose English under Caption Language.
How to change subtitle languageStep-by-step plan
Step 1 - Open Opportunities and check the pipeline
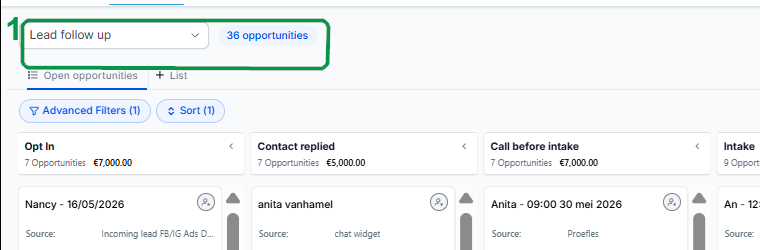
Open directly Opportunities into app.ldgns.be, or click on the left in Leadgains Opportunities. At the top you choose the pipeline. In most accounts there is only one pipeline active.
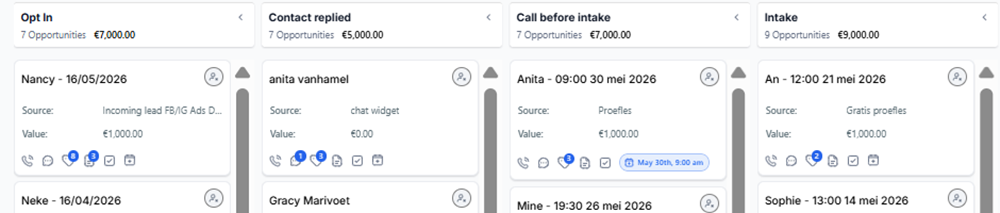
Step 2 - Read the stages from left to right
Each column shows a phase in the follow-up. The most important meaning per internship:
| Internship | Meaning | When will someone come here? |
|---|---|---|
| Opt In | The person has expressed interest in the service. | For example, via database reactivation, advertisements or an organic request on the website. |
| Contact replied | The person replied to a message. | Showing interest is not the same as responding. Only after an answer will the lead be placed in this internship. |
| Call before intake | An appointment has been scheduled. | Use this column for leads that have already been booked, but for which the intake has yet to take place. |
| Intake | The appointment is today or has already happened. | On the appointment date, the lead moves to this column. |
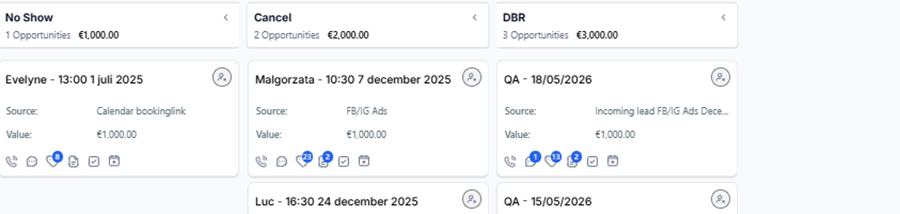
| No Show | The person didn't show up. | This works both ways: if you set the appointment to No show, the opportunity moves to No Show. If you move the opportunity to No Show, the linked appointment will be set to No show. |
| Cancel | The appointment has been cancelled. | This works both ways: if you cancel the appointment, the opportunity moves to Cancel. If you move the opportunity to Cancel, the linked appointment will be canceled. |
| DBR | The person came for an intake, but the decision was not yet final. | Use this, for example, for a 10-day pass or DBR offer that still requires follow-up. |
Step 3 - Open an opportunity card
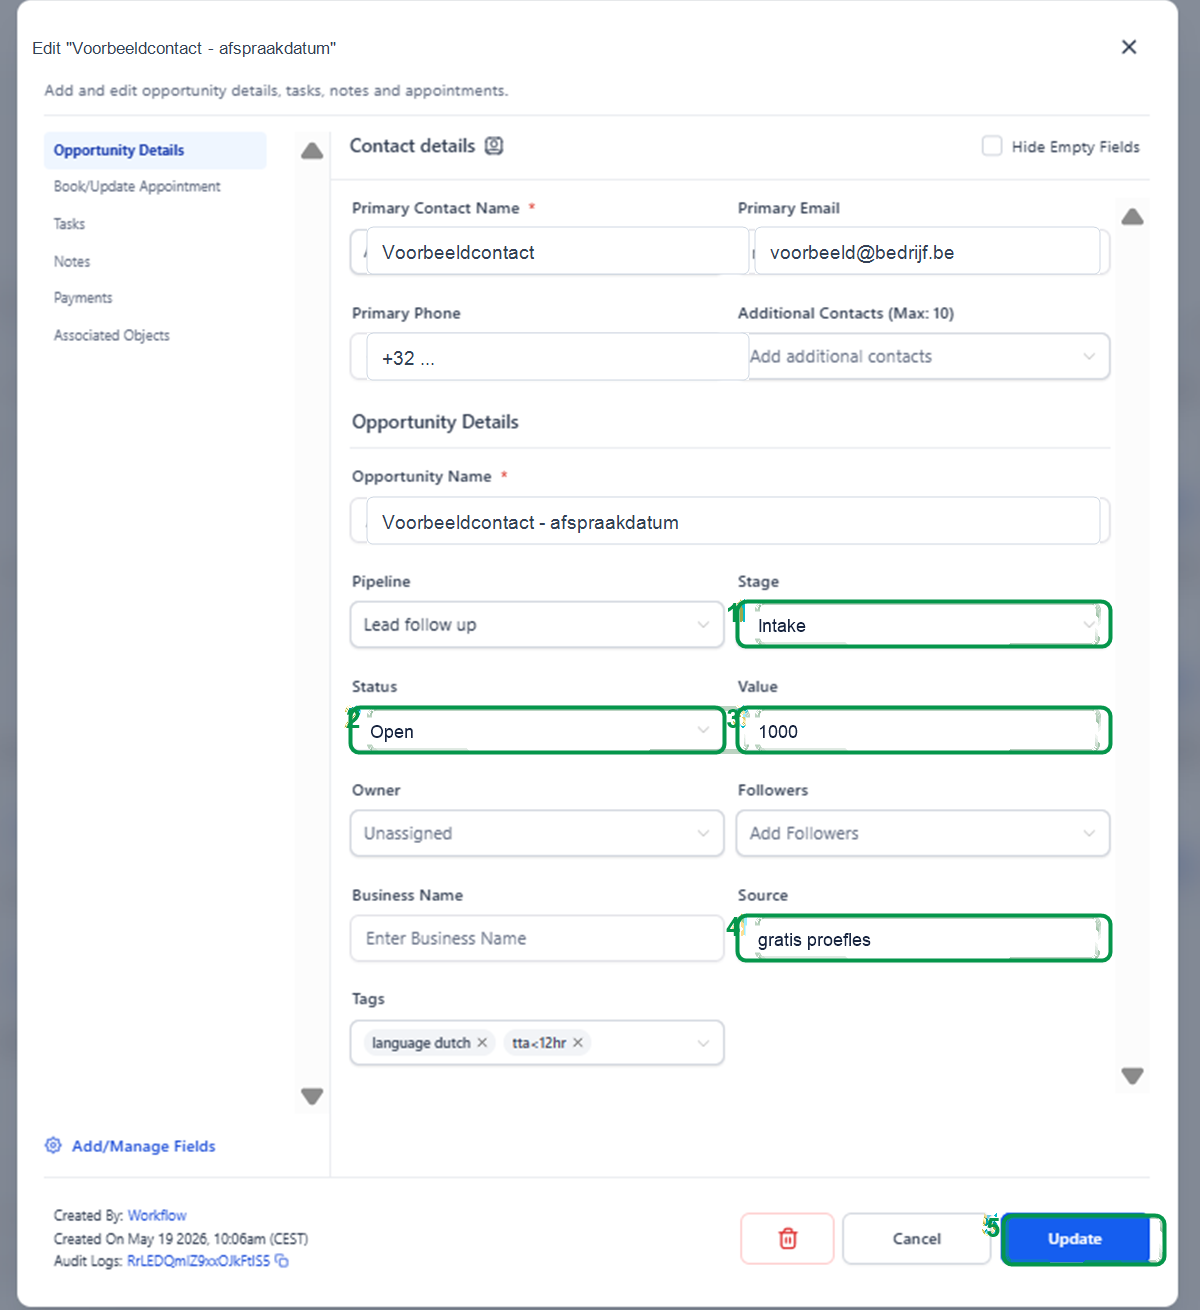
Click on an opportunity card to open the details. In the window you see the contact details, opportunity name, pipeline, stage, status, value, owner, followers, source and tags. Always check first whether you have the correct lead open.
If you click on the contact name itself, you will open the contact sheet. Use that when you want to view the full conversation, contact information, or appointment details.
Step 4 - Adjust stage, status or details
Use Internship to move someone to another column. For example, put someone to No Show if he didn't show up, or to DBR if follow-up is still required after the intake.
Use Status to record the outcome. Set the status to Won when someone starts. If someone does not start after intake or follow-up, you close the opportunity with Lost. If someone is still open for the appointment phase and no longer responds to follow-up messages, Leadgains can automatically close the opportunity Abandon put.
| Status | Meaning |
|---|---|
| Open | The lead is still active. There is no definitive outcome yet. |
| Won | The lead has become a customer. |
| Lost | The lead was not started after intake or further follow-up. |
| Abandon | The lead has not yet booked an appointment and will no longer respond to follow-up messages after a certain period of time. This is normally set automatically. |
Step 5 - Move cards directly onto the board
You can also drag an opportunity without opening the map first. Place your cursor on the map. If you see the move icon, click and drag the card to the correct stage column.
If you drag a card to another stage, that stage will be updated. If you drag a card to the bottom when the status zones appear, you can directly access the opportunity Won, Abandon or Lost put.
Step 6 - Set a lead to Won after a successful intake
If someone has decided to become a customer after the intake, open the card and place Status on Won. Then click Update. You can also record the same outcome by moving the map to the status zone Won to drag.
After saving or dragging, the card disappears from the standard view with open opportunities. That is normal: the opportunity is then registered as won.
Step 7 - Check value, owner, followers and source
Fill Value when you want to monitor the expected value of the membership or offer. Use Owner when a specific employee is responsible for the lead. Add Followers when additional employees need to be able to follow up.
Source shows where the person comes from, for example advertisements, website, chat widget, booking link or DBR. Only adjust this if the source is incorrect or incomplete.
Step 8 - Click Update and wait briefly
Click at the bottom right Update to save the change. Then the circle is complete: the person has been adjusted and should be in the correct stage or status.
Step 9 - Can't find opportunity? Check filters and search bar
Sometimes a coach does not immediately find an opportunity. That often happens because the list defaults only Open opportunities shows. If someone has not started, the opportunity can run out Lost stand. If an open lead before booking an appointment stopped responding to follow-up messages, it can be used up Abandon stand. This causes the map to disappear from the standard view.
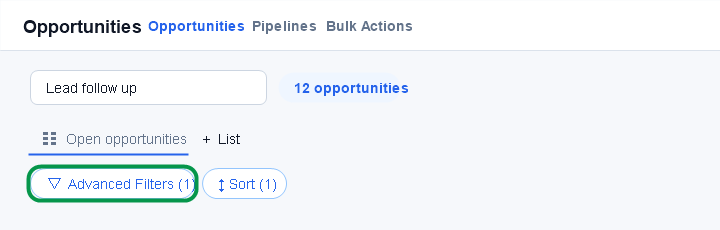
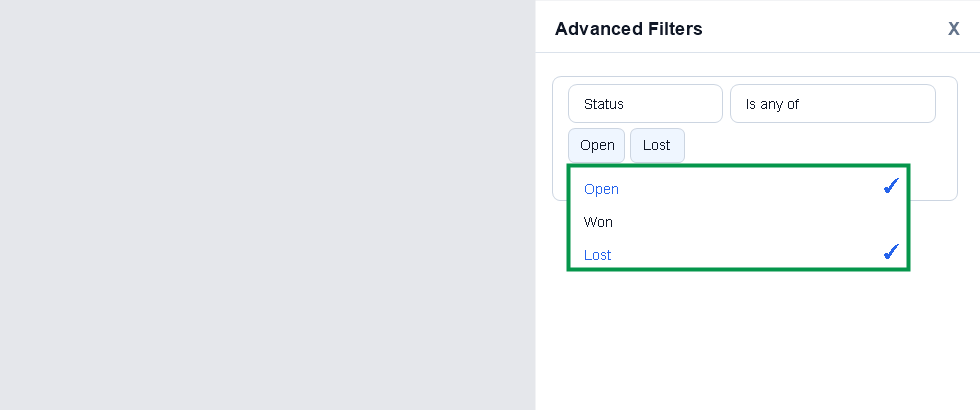
Open Advanced Filters and check the filter Status. Put at least Open and Lost when you search for a contact that does not appear in the regular list. If you are looking for someone who has not yet booked an appointment and has no longer responded, check also Abandon.
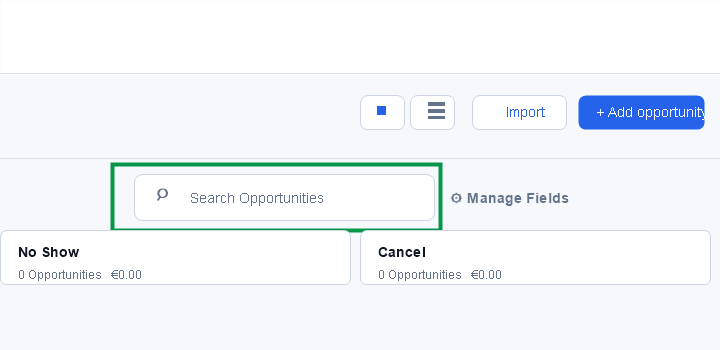
Then use the search bar to search by name. Once you have found the opportunity, open the map and reset the status Open when the follow-up becomes active again. Then place the opportunity in the correct stage using the steps above.
Common problems
Wait a moment and then refresh the page or list. Stage and status changes may take a few moments to become visually visible.
Yes. Drag the card to another stage column to change the stage. Drag the card to the status zones at the bottom to view the opportunity Won, Abandon or Lost to put.
Opt In means that someone has shown interest. Contact replied means that the person has actually responded to a message.
Use No Show if the person did not show up. If you set the appointment status to No show, the opportunity moves to No Show. If you move the opportunity to No Show, the linked appointment will be set to No show.
Use Cancel when the appointment has been cancelled. If you cancel the appointment, the opportunity moves to Cancel. If you move the opportunity to Cancel, the linked appointment will be canceled.
Use DBR when someone came for an intake, but is not yet sure about starting, for example with a 10-day pass or DBR offer.
Check first Advanced Filters. By default you see the Open opportunities. Also put Lost on and check Abandon when the lead had not yet booked an appointment. Then search via Search Opportunities. If you find the card and the lead needs to be followed again, reset the status to Open and choose the correct stage.