Settings
Add and manage a staff member in Leadgains
Add a new team member through My Staff, configure roles and permissions correctly, and manage verification, password, calendar and notifications per user afterwards.
Brief overview
Open My Staff in app.ldgns.be directly. First confirm that you are in the correct account. From there you can add a new employee or manage existing users.
For a new user you need at least a first name, last name and email address. After that, choose the correct role, enable only the necessary permissions and optionally configure availability, calendar connection, call settings and notifications.
Video explanation
Watch the walkthrough if you want to follow the full process on screen, from User Info to Roles & Permissions and the extra user tabs.
This video is in Dutch. Click the gear icon in the video player, turn on Closed Captions and choose English under Caption Language.
How to change subtitle languageRequirements
- Access to the correct Leadgains account with permission to manage My Staff.
- At least the employee’s First Name, Last Name and Email.
- Optional extra info such as phone number, personal calendar or notification preferences if you want to configure them immediately.
Step-by-step plan
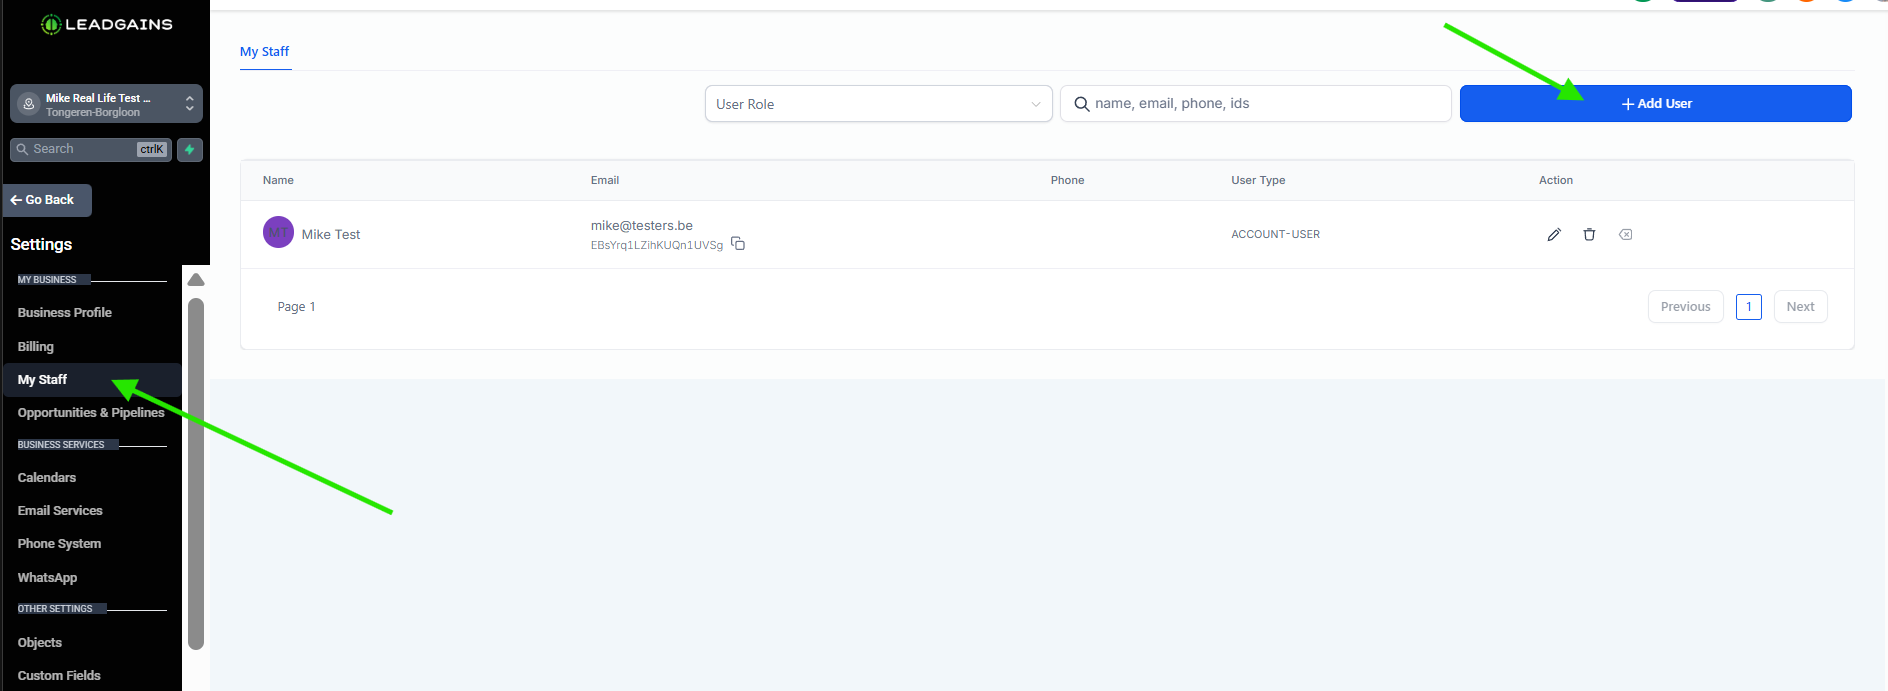
Step 1 - Open Settings > My Staff
Open My Staff in app.ldgns.be directly, or in Leadgains go to Settings and open My Staff. From this page you can start a new user or reopen an existing employee to adjust details, rights and other settings.
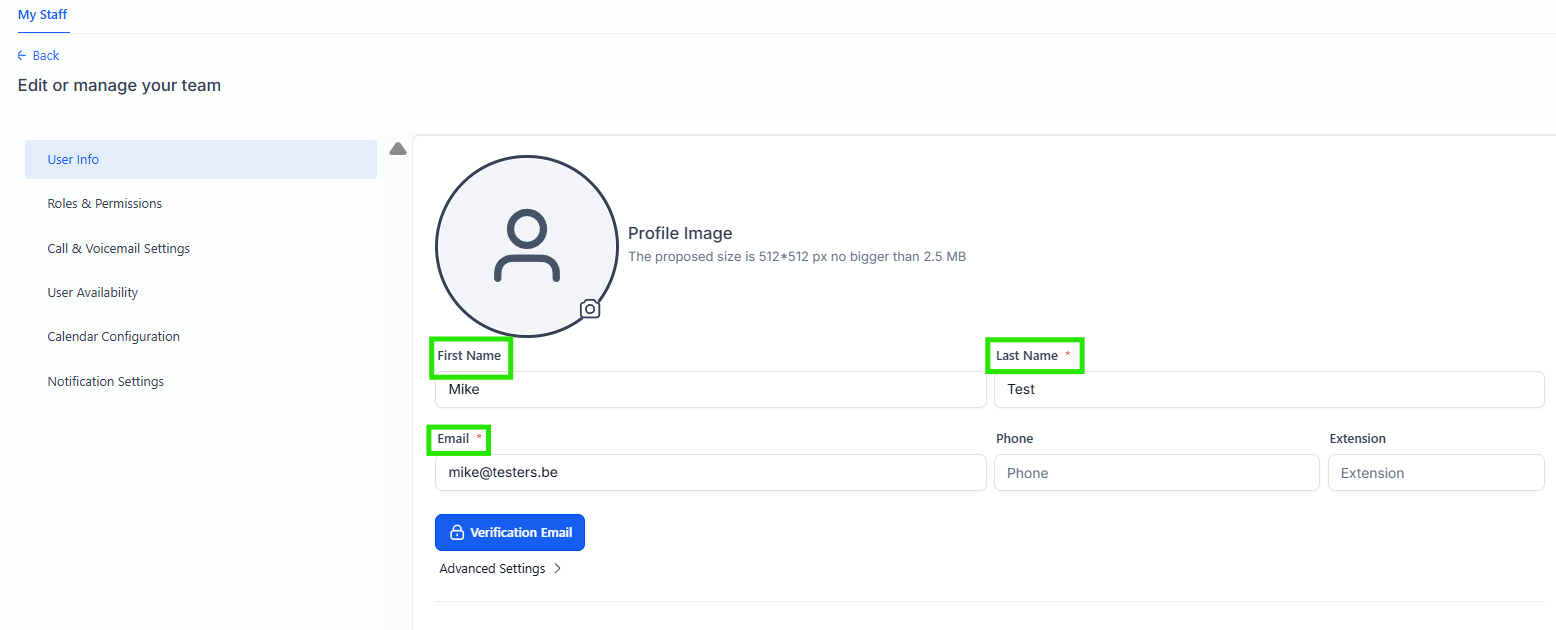
Step 2 - Fill in the user information
Under User Info, enter at least First Name, Last Name and Email. A phone number and extension are optional. You can also add a profile image and later connect a calendar or email signature.
Then click Next or continue to the permissions step, depending on how your screen shows this flow.
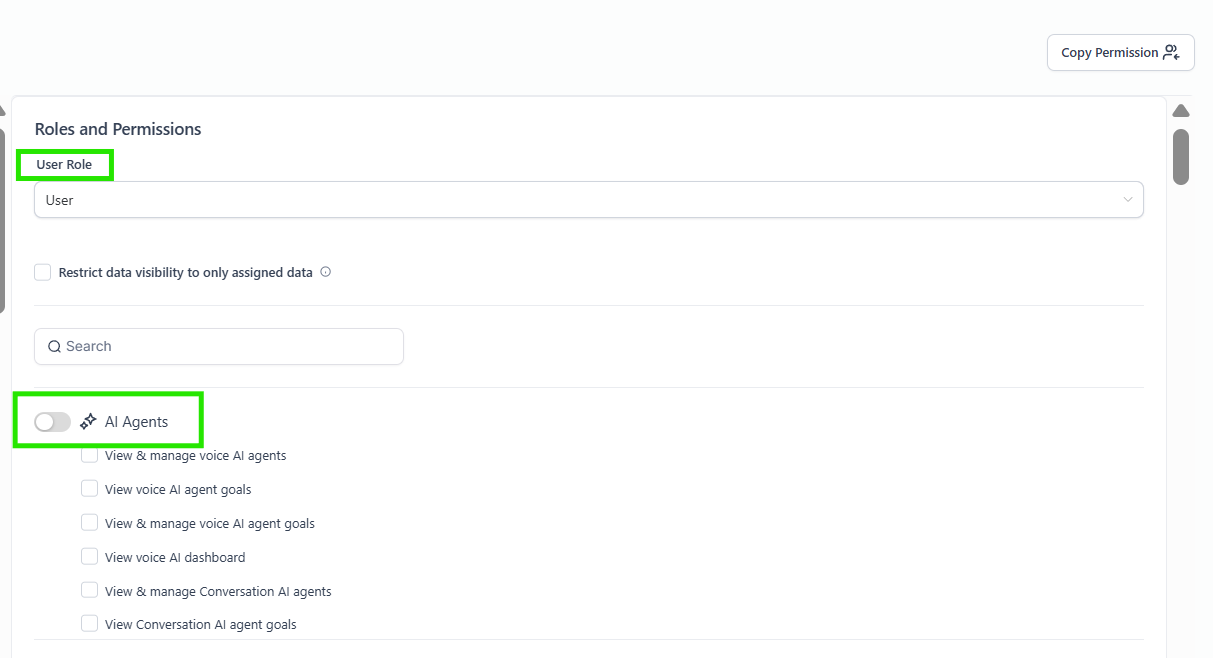
Step 3 - Choose the role and configure permissions
Open Roles & Permissions and first choose the correct User Role. Admin gives more access than User, so only choose admin when that employee genuinely needs broader management rights.
Then use the search bar and toggles to enable only the necessary modules. You can manage permissions for items such as Search, AI Agents, Account Settings, Account Tools, AI Studio, Automation, Blogs, Calendars, Contacts, Conversations, Forms, Funnels, Integrations, Marketing, Memberships, Opportunities, Orders, Payments, Products, Quizzes, Reputations, Subscriptions, Surveys, Taxes, Transactions and WordPress.
If you want a new employee to receive exactly the same rights as someone else, use Copy Permissions once you already have one correctly configured user. This copies the complete permission setup to the new user in one go.
Step 4 - Save the user and manage basic actions
Click Save to create the user. Afterwards you can reopen an existing employee to update their details or permissions.
If the employee did not receive the verification email, send it again via Verification Email. In the same user settings you can also change the password. To edit the user, open the pencil icon. If the user is no longer needed, remove them with Delete.
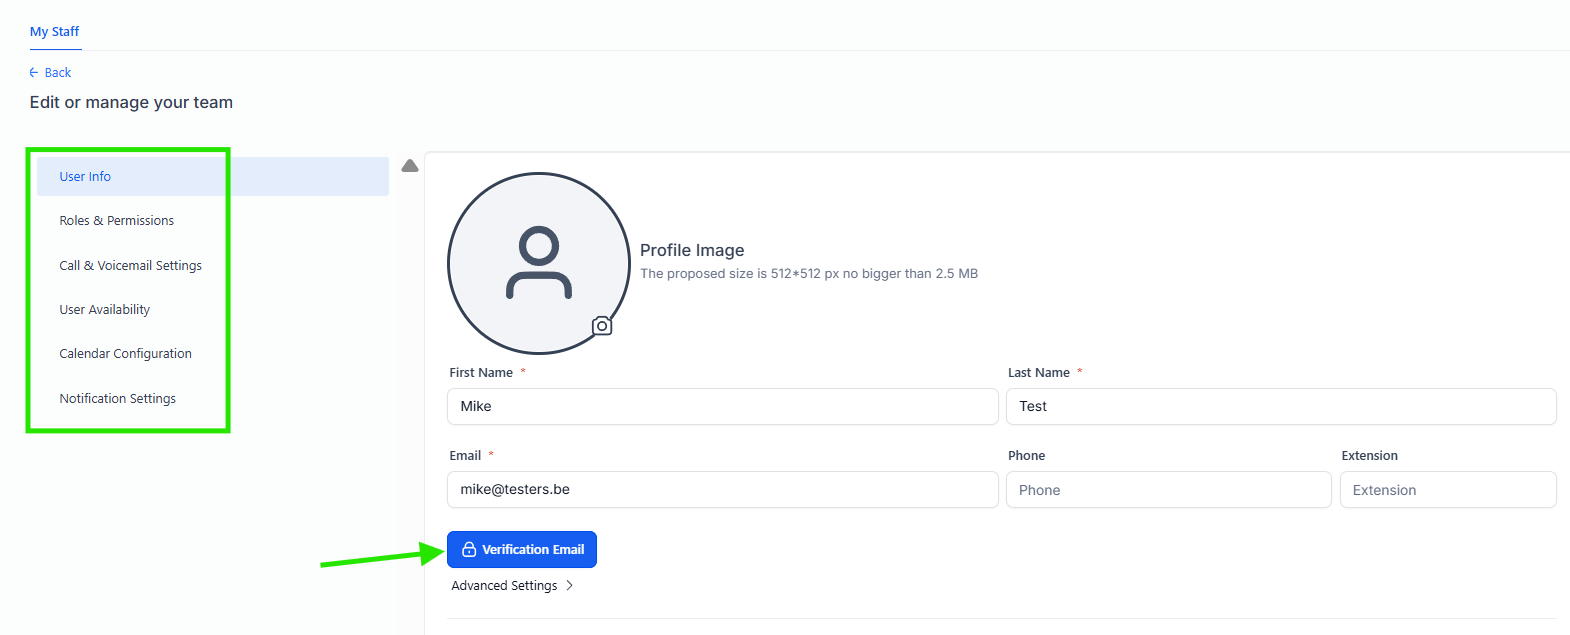
Step 5 - Optional: finish the advanced settings
This step is optional and not required to create a staff member. Use these advanced settings only when you want to configure extra details per user:
- Call & Voicemail Settings: assign a personal number and manage phone-related settings.
- User Availability: define when this user is available.
- Calendar Configuration: connect a personal calendar when each employee works with a separate calendar.
- Notification Settings: decide which notifications the user receives and whether they arrive in the app, by email or by SMS.
Common problems
You need at least First Name, Last Name and Email. Phone number, extension, calendar and other extras are optional.
Choose Admin only for people who truly need broader management rights. For most employees, User is sufficient, combined with only the modules they actually use.
Yes. Use Copy Permissions once a correctly configured reference user already exists. This copies that person’s permission setup to the new employee so you do not need to check everything manually again.
Open the user again in My Staff and click Verification Email to resend it. If needed, you can also reset or change the password there.
These tabs manage the staff member’s personal setup: call availability, working hours, calendar connection and how notifications should be delivered.