Calendars & appointments
Pairing Google Calendar with Leadgains
Use this how-to to connect a Google account to Leadgains Calendars so that appointments and availability are properly synced.
Brief overview
The Google Calendar connection allows Leadgains to synchronize appointments with the user's calendar. This helps to avoid double bookings and ensures that new appointments are visible in the right place.
The connection is made per user. Every employee who works with his or her own Google Calendar must therefore link his or her own account.
Supplies
- An active Google account.
- Rights to open calendar settings.
- Permission to mount Google Calendar with read and write permissions.
Step-by-step plan
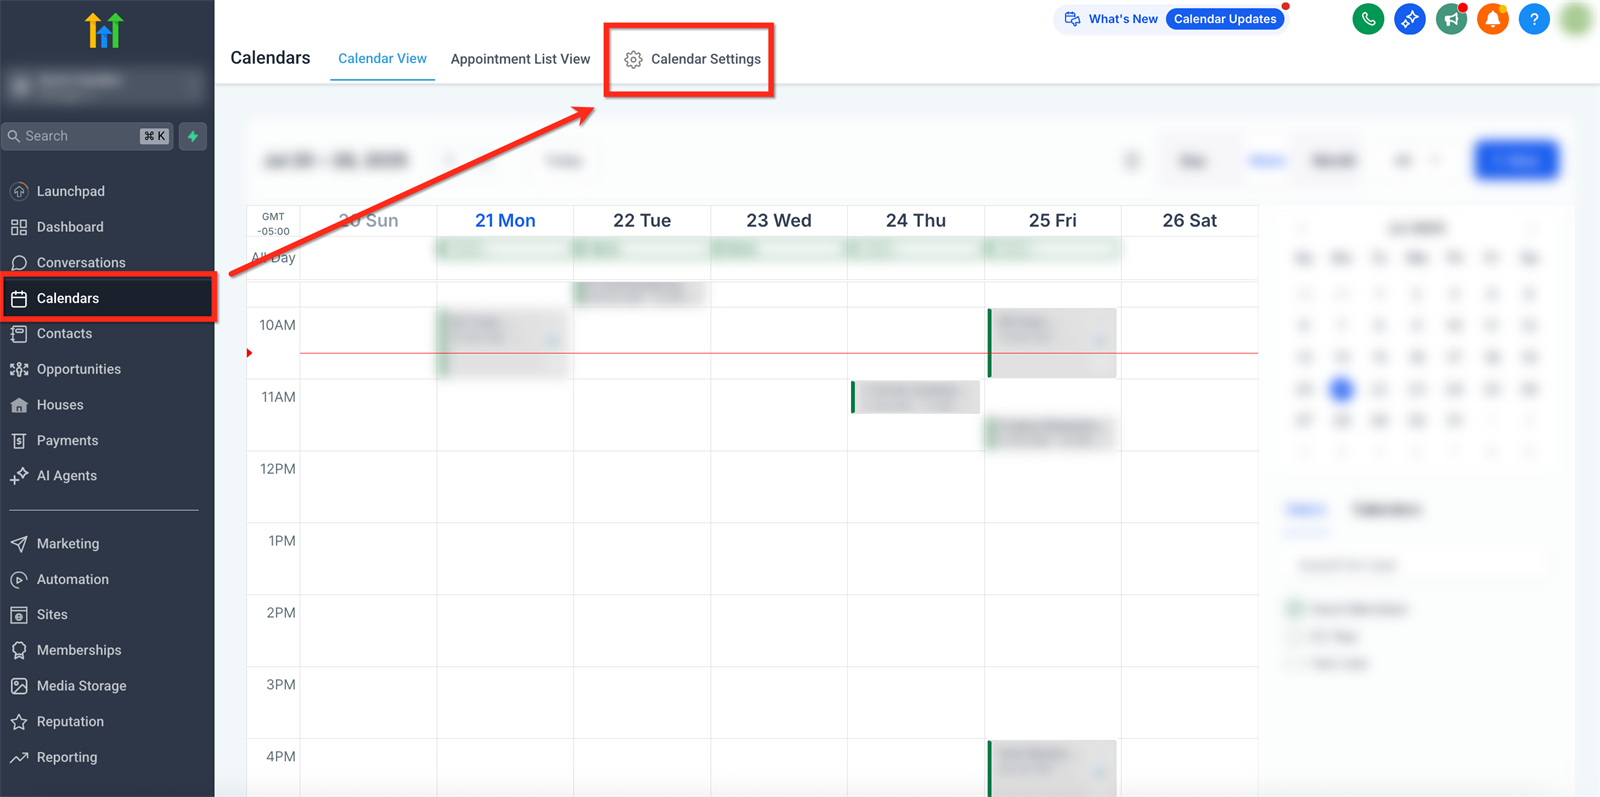
Step 1 - Open Calendars
Open directly Calendars into app.ldgns.be, or go to the correct subaccount Calendars via the left navigation. Then click at the top Calendar Settings.
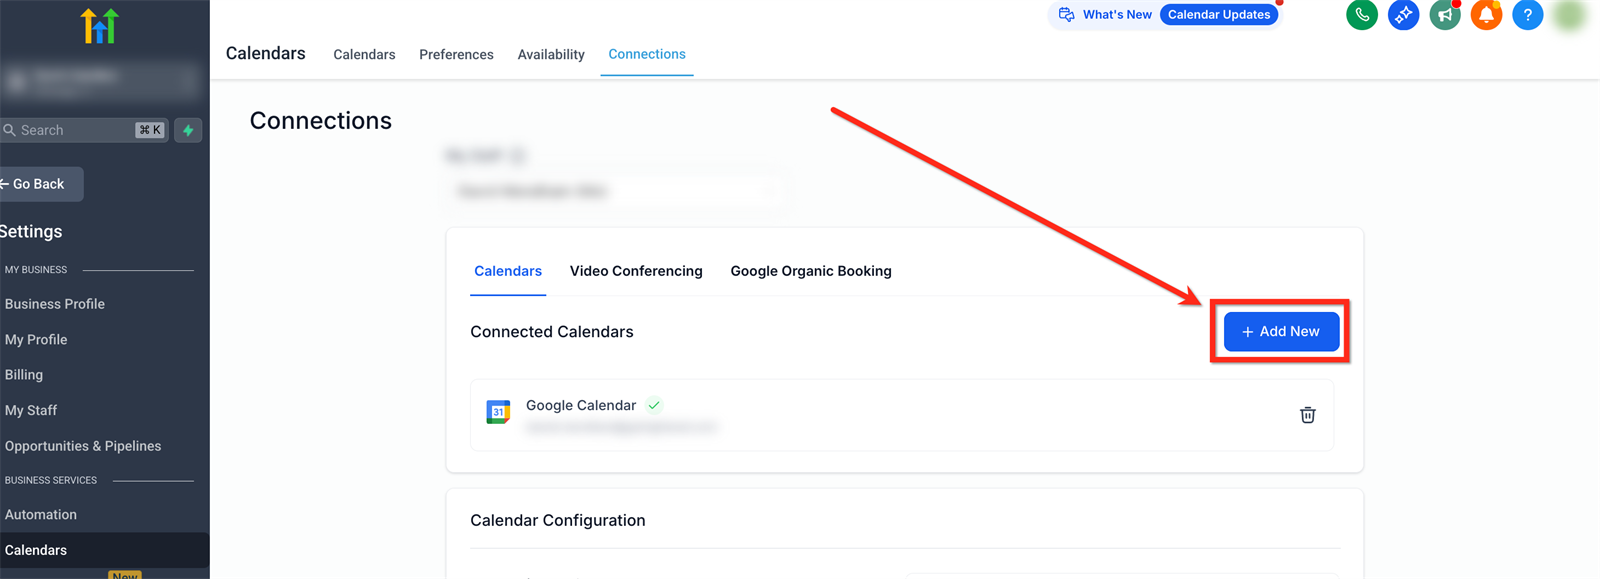
Step 2 - Go to Connections
Open the tab Connections. Then click AddNew to add a new calendar integration.
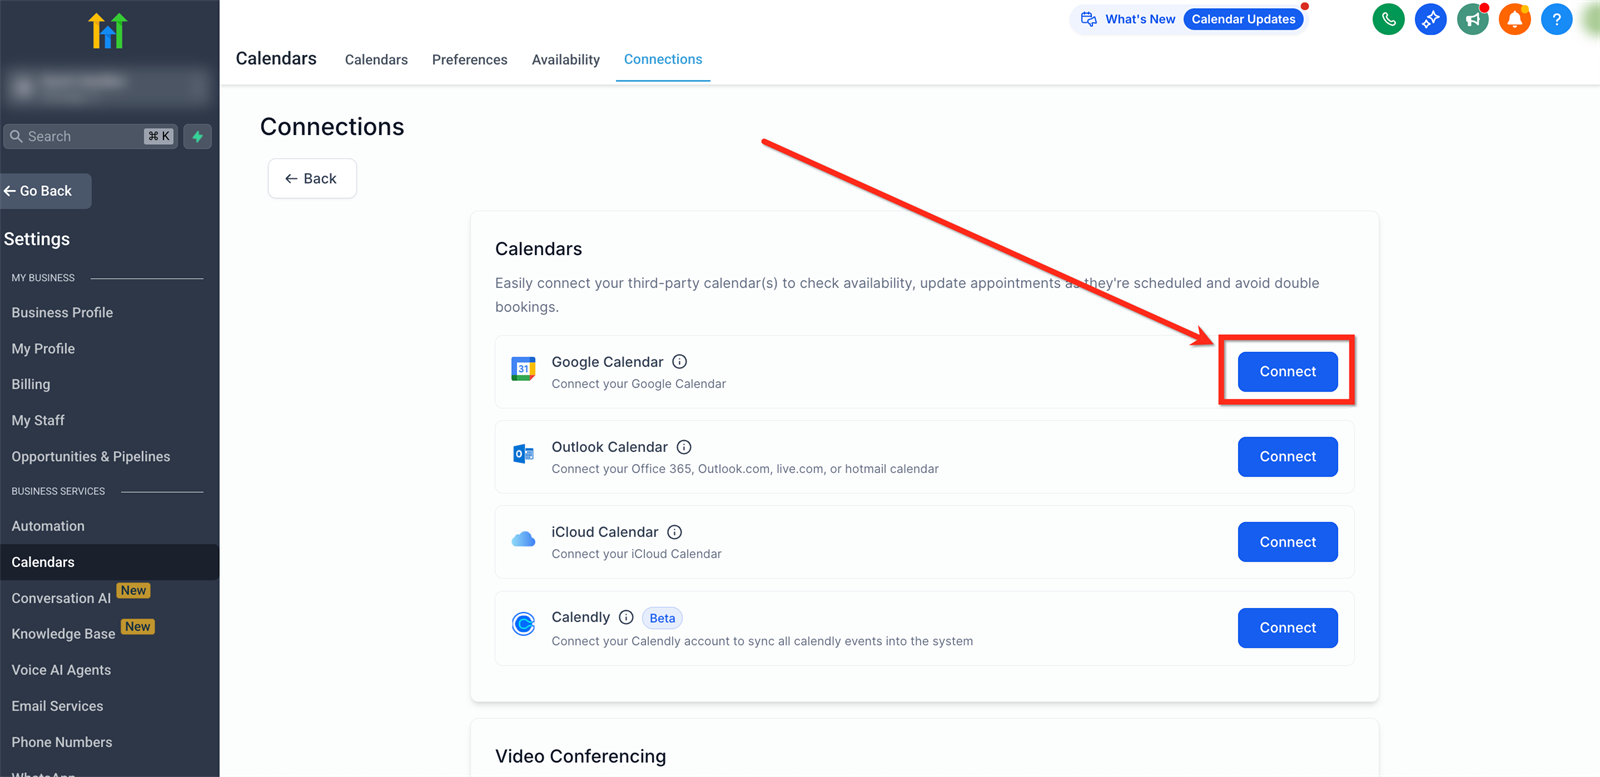
Step 3 - Choose Google Calendar
Search the list for Google Calendar and click Connect.
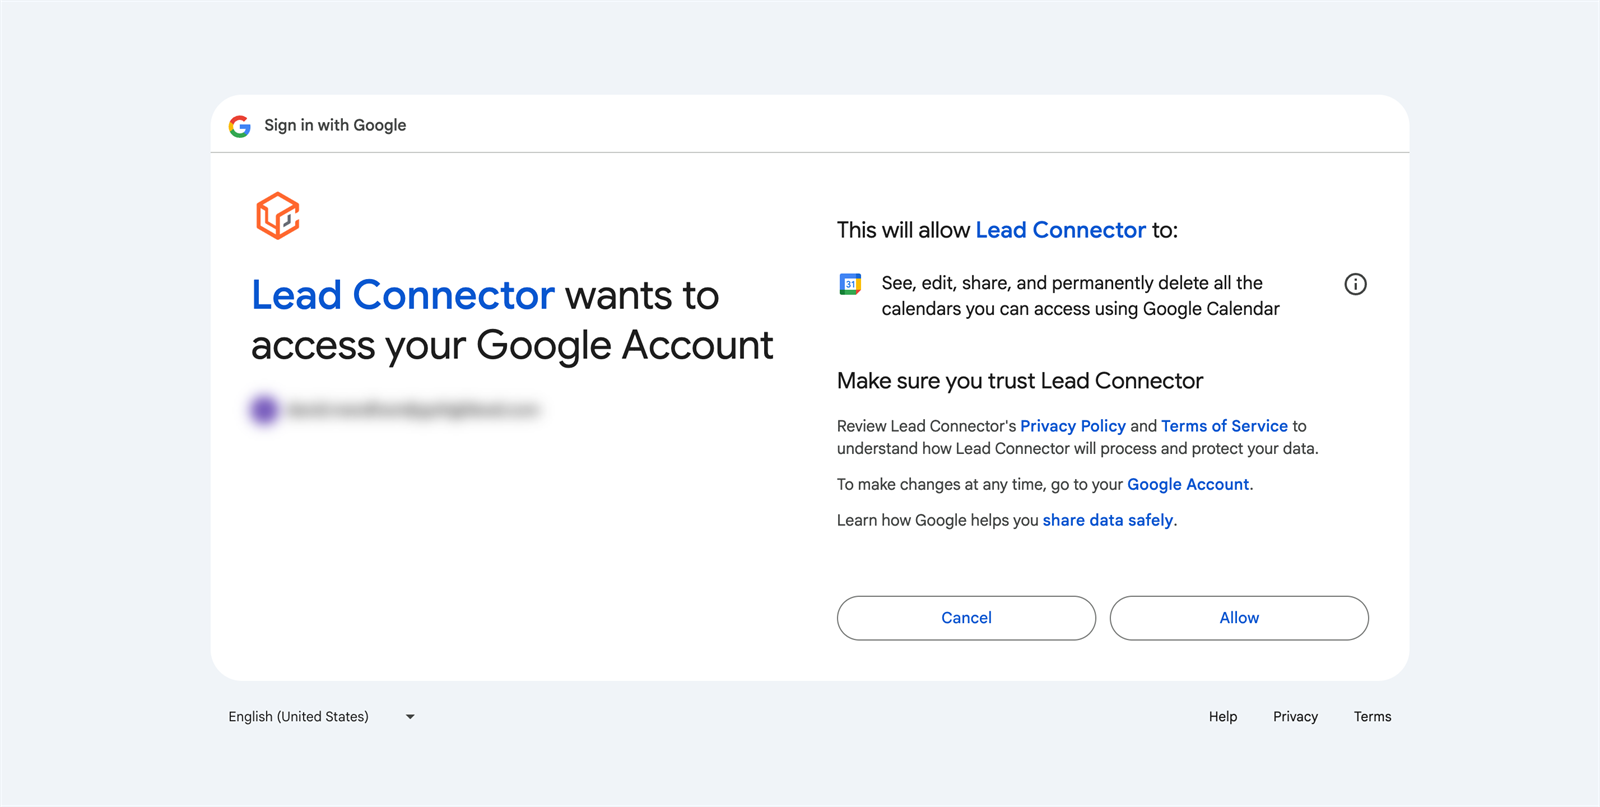
Step 4 - Give Google permission
Select the correct Google Account and approve the requested permissions. Allow calendar access, profile data, and email access when Google requests it.
Step 5 - Check the calendar choice
Choose which Google Calendar will be used as a linked calendar for bookings. If necessary, add other calendars as conflict calendars, so that existing occupancy prevents double bookings.
Common problems
Make sure all Google permissions are approved. Reconnect the integration when there is a message about missing permissions.
Make sure the user is signed in with the correct Google account. If necessary, log out of other Google accounts and reconnect.
Possible causes include expired tokens, revoked Google permissions, or a deleted calendar. Reconnect the calendar and choose an active calendar.
Do not use this as a standard solution. The connection is user-specific, so each user should connect their own Google Calendar.